Gala and I often joke that we should start a blog series called ‘DIY for the ham-fisted’ as both of us are just terrible at all things crafty! While I still haven’t quite got round to that one, I decided it was high time that I posted some new DIYs for you creative babes to get your mitts on, it’s been a while after all!
So I called upon the expertise of the amazing Jen from Head Full of Feathers who has created four amazing and exclusive DIYs for you guys! I’ll be posting one every two weeks for the next eight weeks.
ENJOY!
Supplies Needed
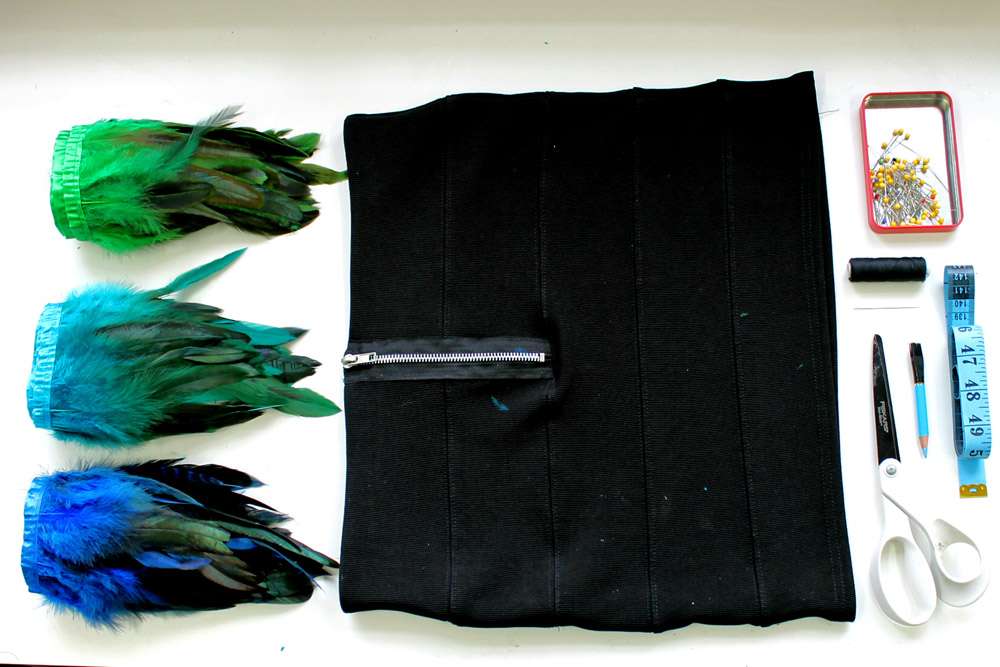
♥ Feather trim x 3 colours (length of trim depends on your measurements. You will want the rooster feathers at around 7-8 inches length).
♥ Bodycon stretch miniskirt
♥ Scissors
♥ Tape measure
♥ Chalk pencil
♥ Needle and thread
♥ Dressmakers pins
Method
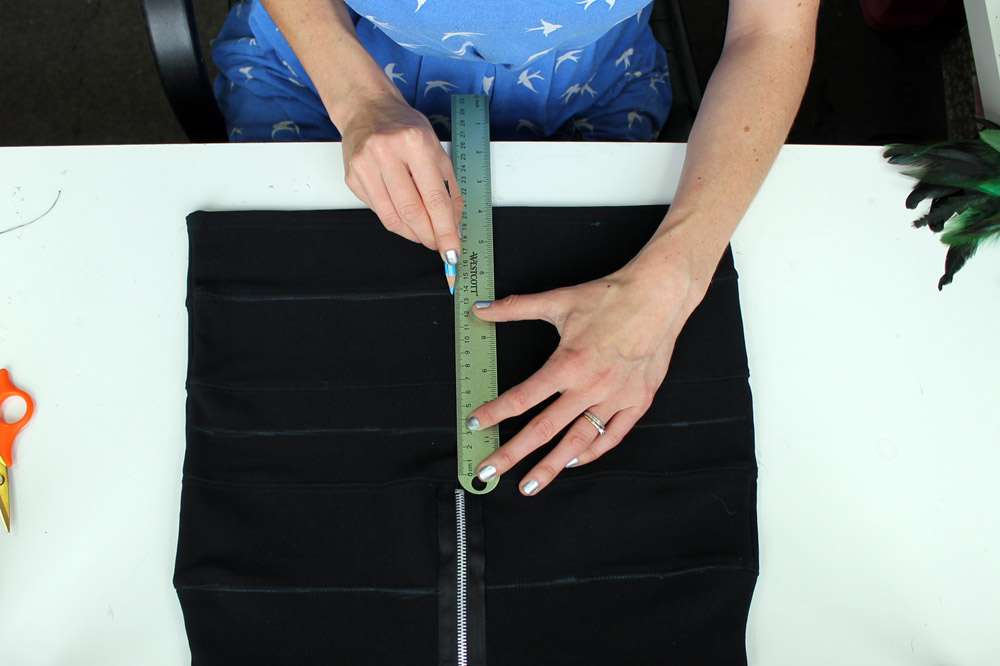
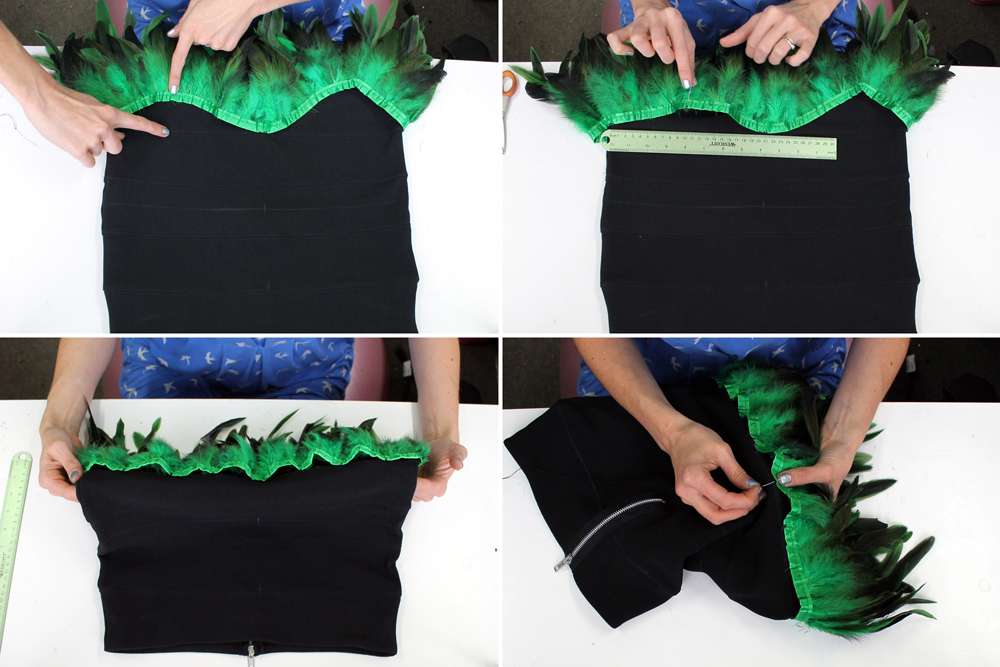
Step One: Measure 8 cm from the top of your skirt and mark with your chalk pencil, measure 10 cm down and mark again, and then another 10 cm down. The top 8 cm will be left without feathers and gives the skirt some shape with a waistband.
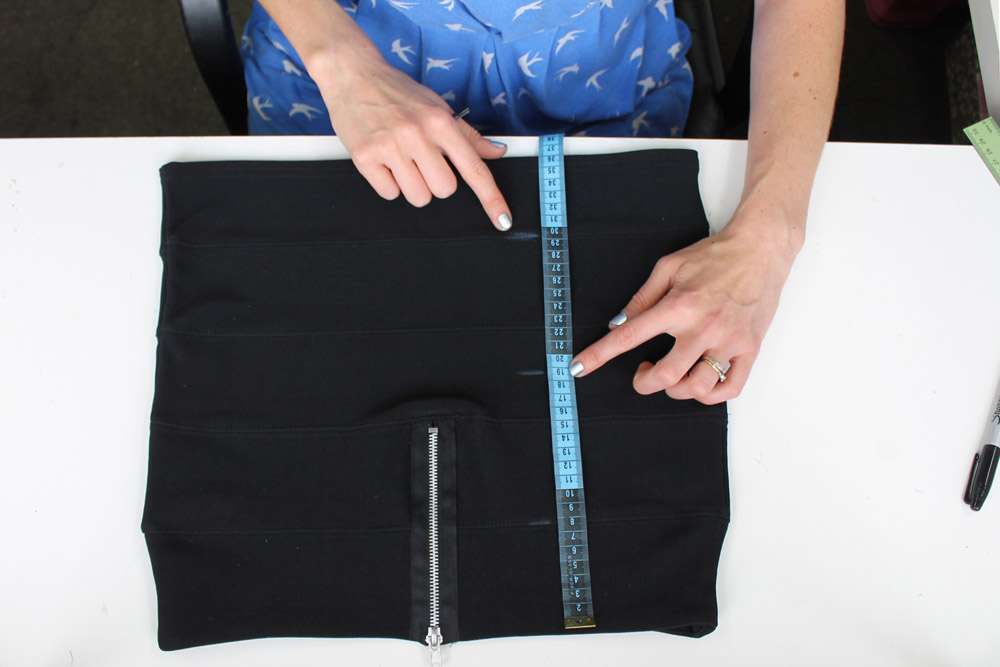
Step Two: 2. Draw a line all around the skirt on these measurements with your chalk pencil.
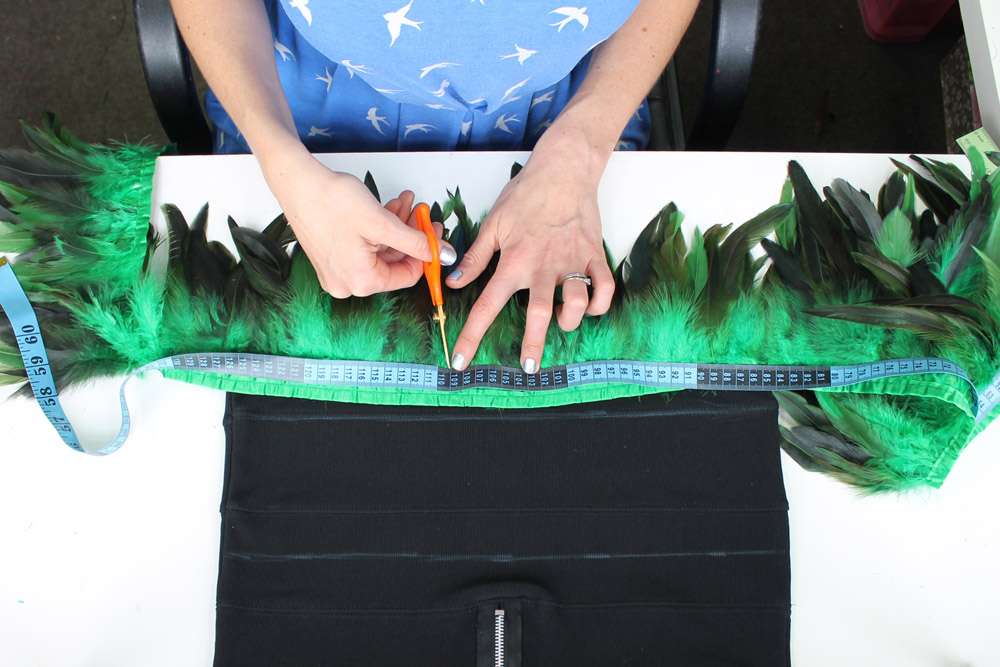
Step Three: To measure how much feather trim you need, put your skirt on and stand with your feet shoulder width apart. This will allow for the stretch of the skirt while you wear it and will give you a comfortable amount of feather trim to use.
Step Four: Take the measurements around your body at the same points as the chalk lines.
Step Five: Add 6 cm to each measurement (2 cm for a fold-over seam allowance and 4 cm for extra give in the trim).
For example, my measurements are 95 cm for the top (blue) section – so cut length is 101 cm, 102 cm for the middle (turquoise) section – so cut length is 108 cm and 109 cm for the bottom (green) section – so cut length is 115 cm. Cut the feather trim to the correct length.
Step Six: On the skirt, mark the centre back and centre front on all the lines and lay the skirt front side up.
Step Seven: Starting at the bottom, hold the (green) feather trim in half to find the centre.
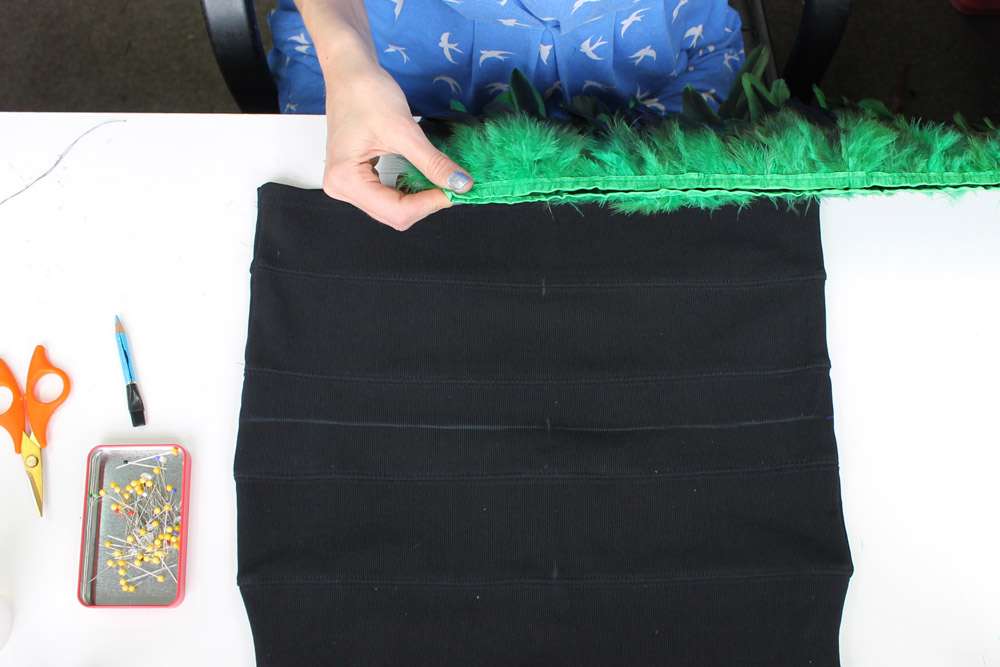
Step Eight: Pin the centre of the trim onto the centre front mark you made on the bottom line.
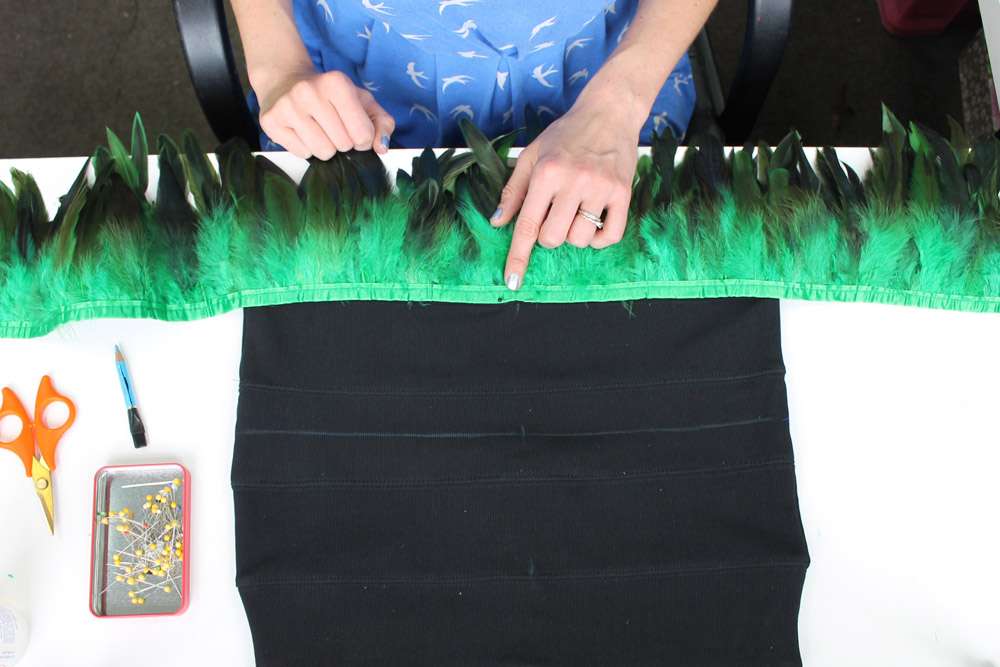
Step Nine: Flip the skirt and feather trim combo over (so the feather trim is in a loop around the skirt). Fold in 1 cm on each end of the trim to make it neat and stitch these ends together on the centre back mark you made with the chalk. Then flip the skirt again and stitch where you pinned at the front.
Step Ten: Flip the skirt a quarter of the way around and flatten so that the side seam of the skirt is facing up at you. Stitch the centre of the trim to the side seam. Then flip it over again and stitch the other side seam. The skirt will now have the bottom piece of trim attached at four points.
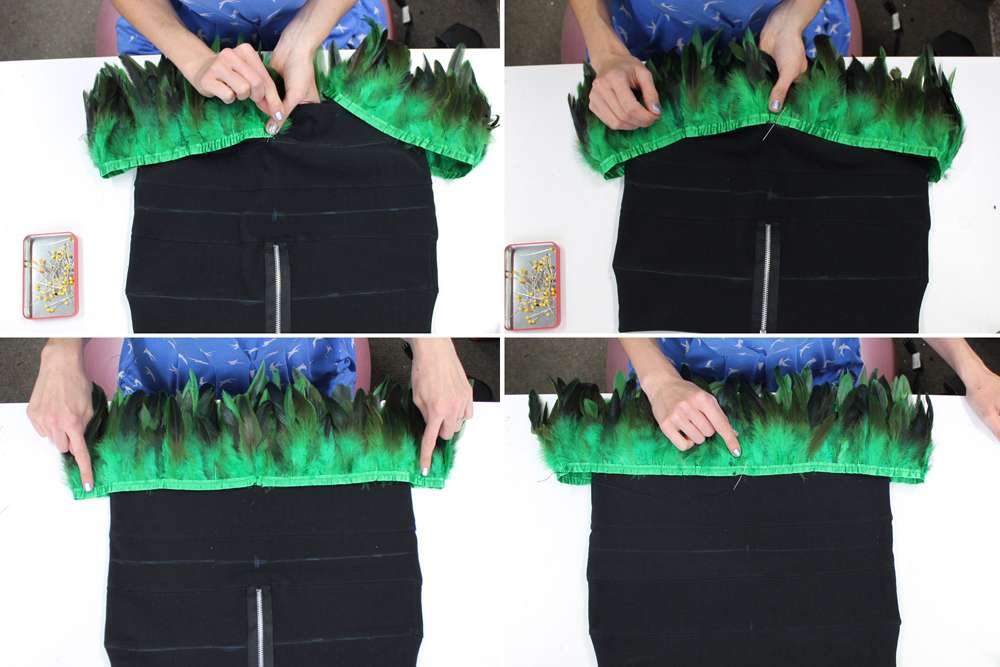
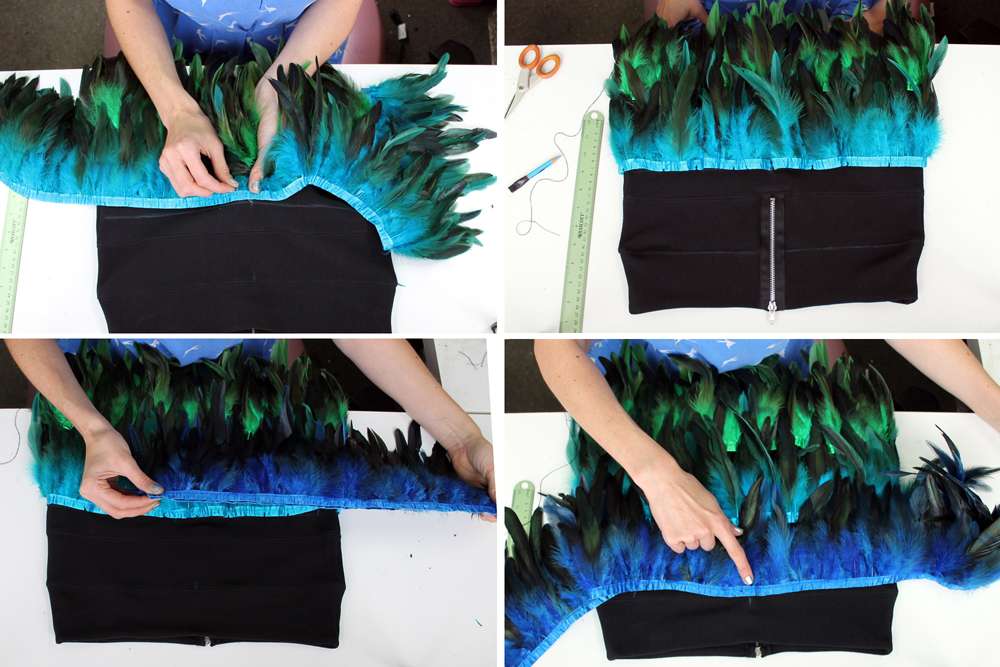
Step Eleven: Continue this process, attaching the trim to the skirt at half way points between the stitching until the trim is attached at 16 points around the skirt on your chalk line. The trim is longer than the circumference of the skirt so it will bunch up – this is ok, it will smooth out when you are wearing it.
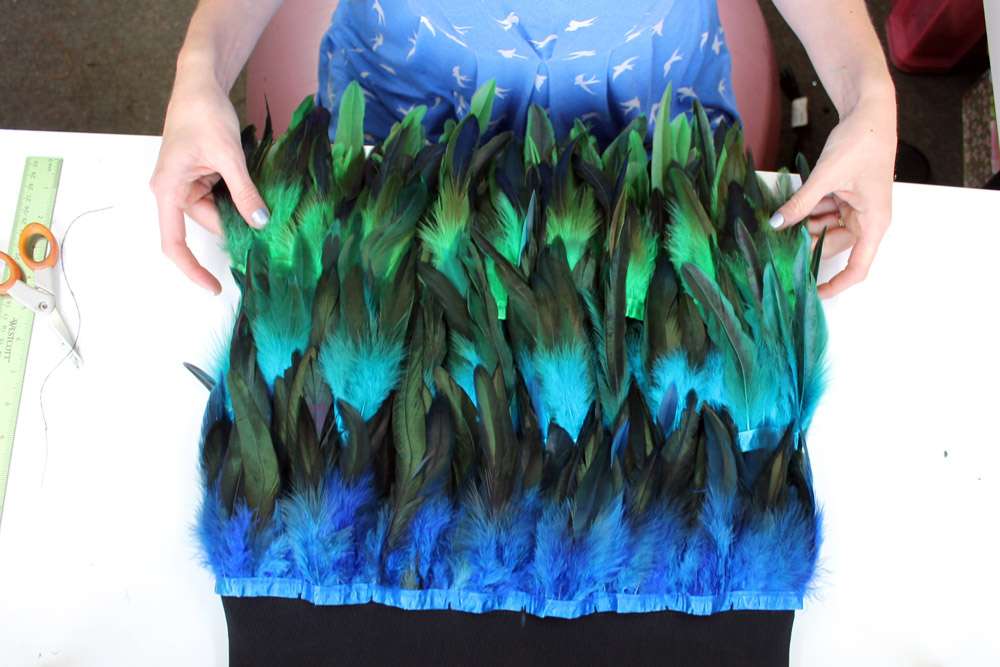
Step Twelve: Repeat with the next two layers of feathers working up the skirt, turquoise to blue, and then you’re done!
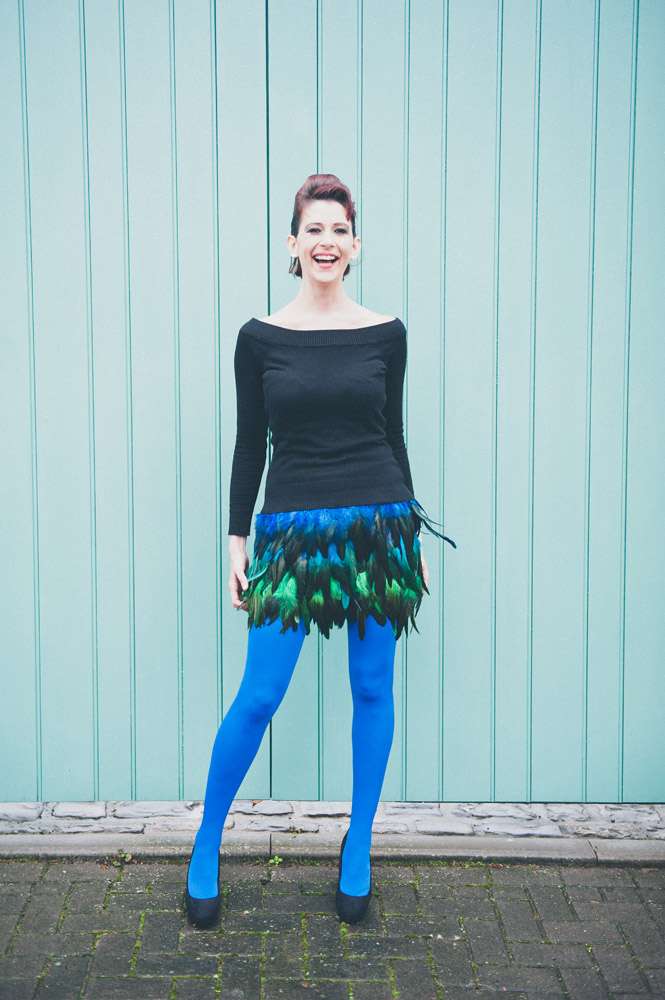
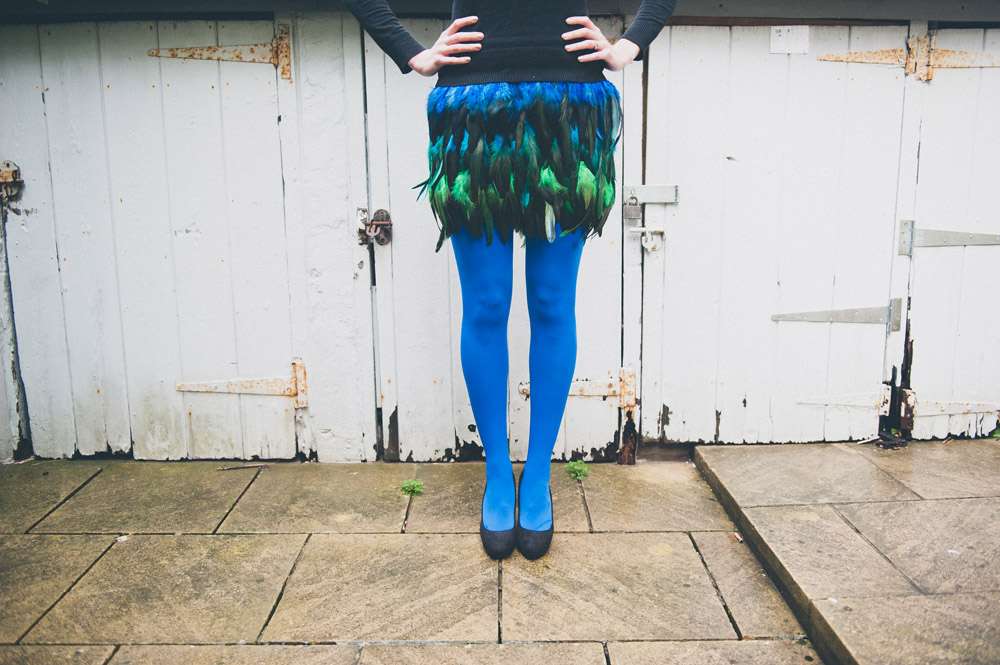
You could wear it with a pair of complimentary coloured tights, as I have, or make a few of them for your very lucky bridesmaids!
Suppliers
- Photography: Laura Power