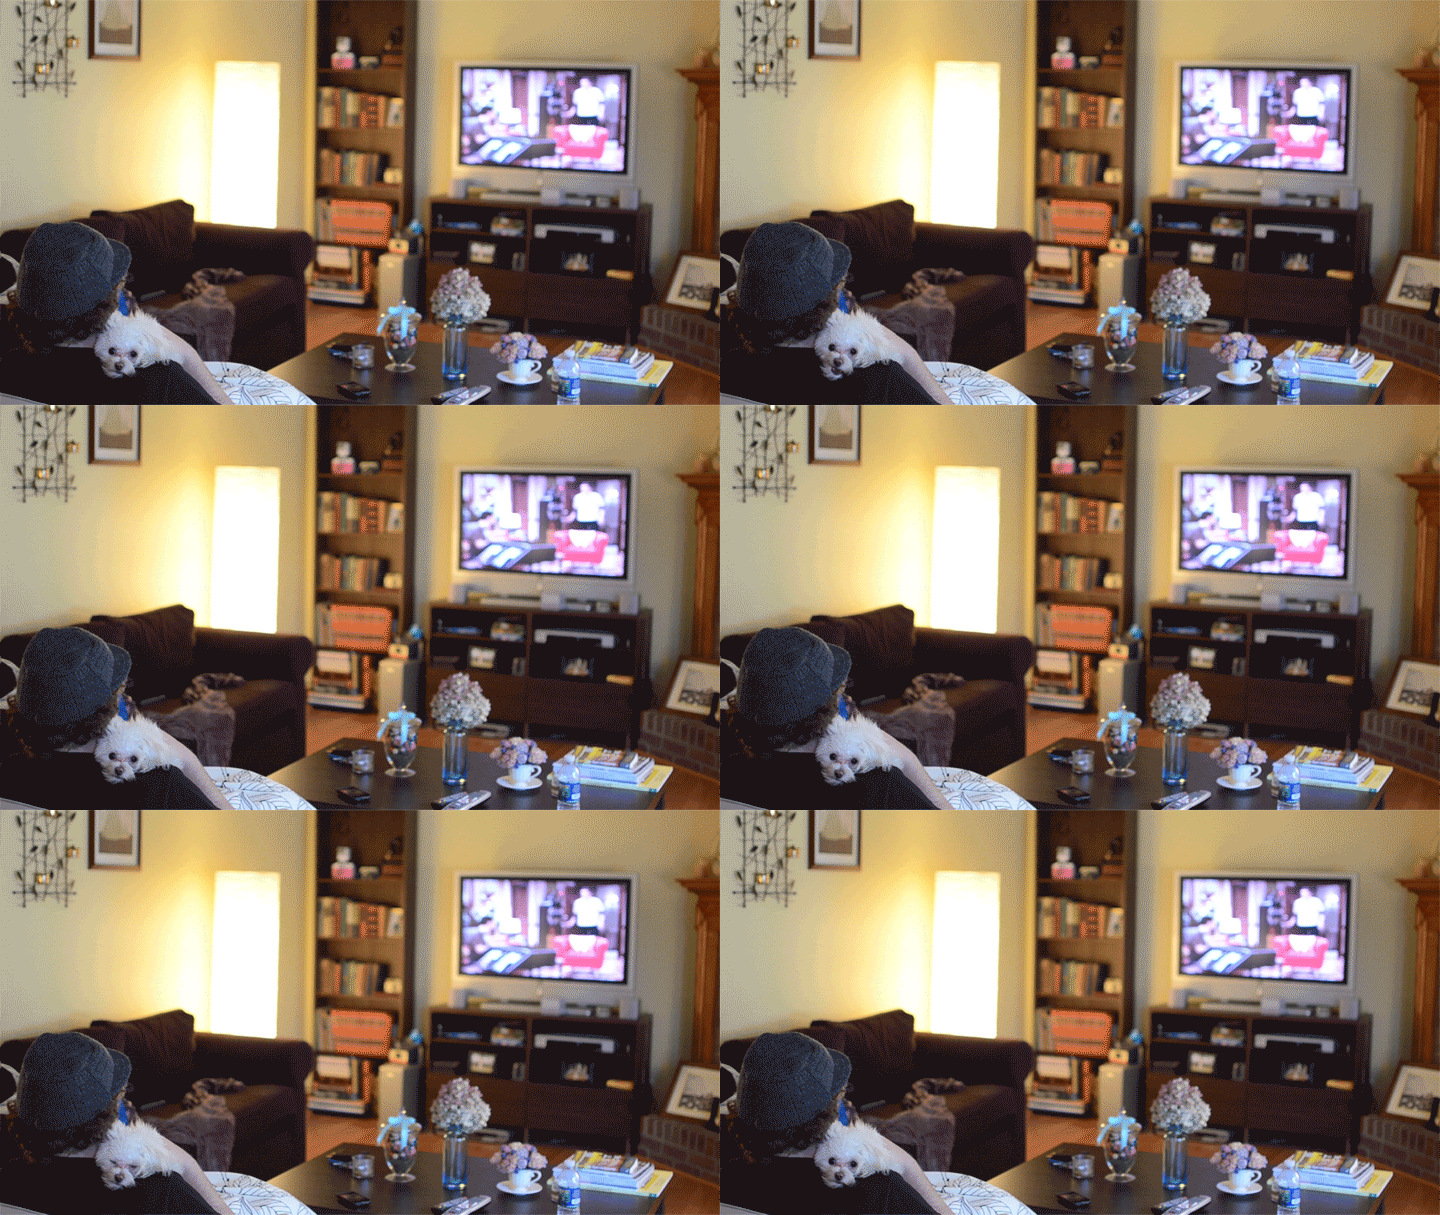
I’ve been obsessing over cinemagraphs for ages – in essence they are still images with a small isolated section that moves. When you first see them they’re quite confusing but totally entrancing! I’ve always wondered how they were made and how you can get essentially a still image to have bits of moving video within it but today (eeek) my questions have been answered. When I was sent this Photoshop tutorial by photographer Violet Short I literally gasped. Check out this cute one she made of her dog Marshmallow!
My name is Violet and I blog over at Blythe Ponytail Parades, a compilation blog featuring my photography and progress with the business, food and crafts! I am always trying to keep things fresh, new and exciting while posting throughout the week! Come on over if you enjoy vintage inspired photography, new decadent recipes or a load of inspiration to brighten your day!
Today I will show you how I worked through my video to create a cinemagraph. I will note, using living objects or anything near someone’s face (like moving hair as I did for this tutorial) can be difficult. I wouldn’t recommend it for your first one.
I will preface by saying that you will need a basic knowledge of photoshop to attempt this tutorial. If you aren’t sure how to use photoshop, than this tutorial might end up not being explained well enough. So bare with me and ask as many questions as you need to!
Step One: First, you will need to come up with a subject matter, decide what you want to be moving and what you are going to isolate. For my video, we set up a tripod (which is essential) in our living room and turned on the video recording spot on my camera. I sat on the couch with a fan blowing at me and I wanted to isolate everything but a few hairs that would move with the air.
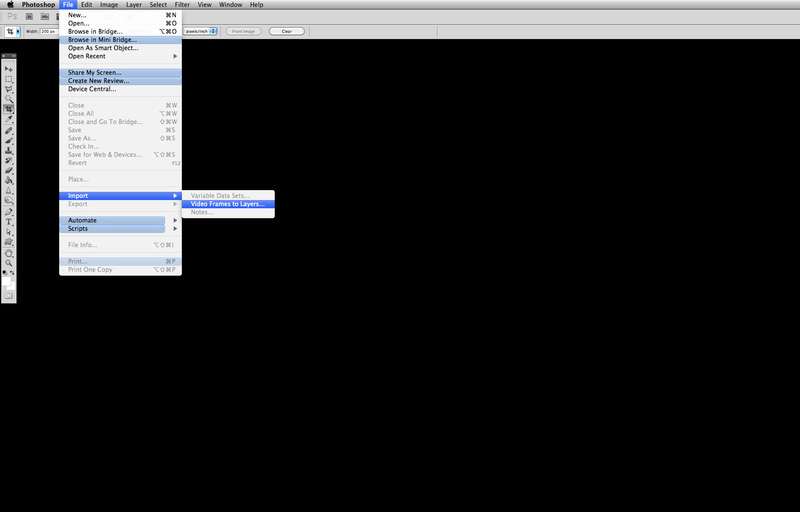
Step Two: Once you have your video file, here’s what you do: File – Import – Video Frames to layers – locate your file.
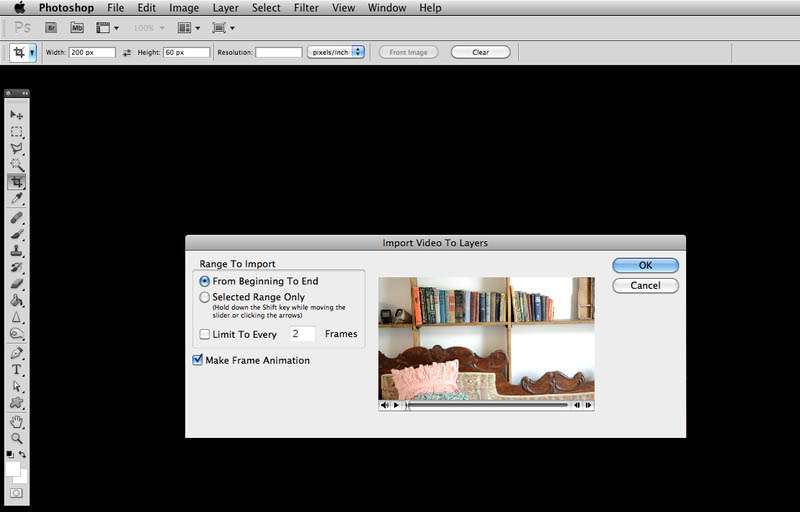
Step Three: Now this box (below) will allow you to choose how many frames you want to include and allows you to narrow down your video from say 30 seconds to 5 seconds. The shorter, the easier.
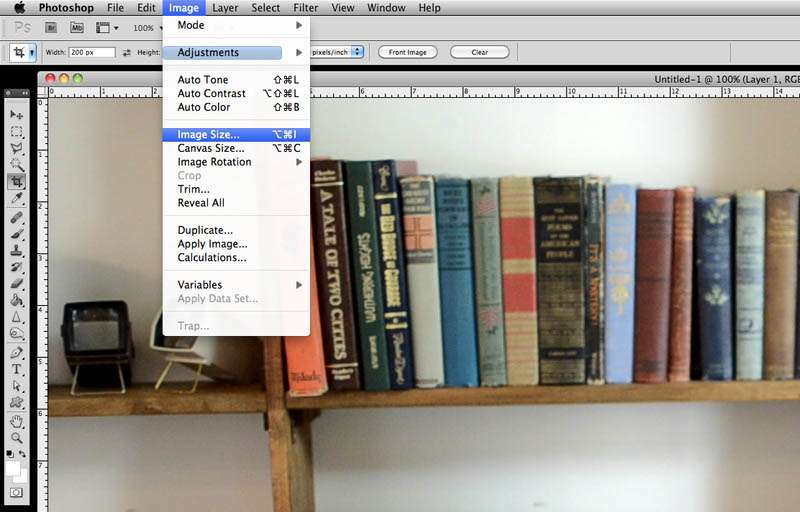
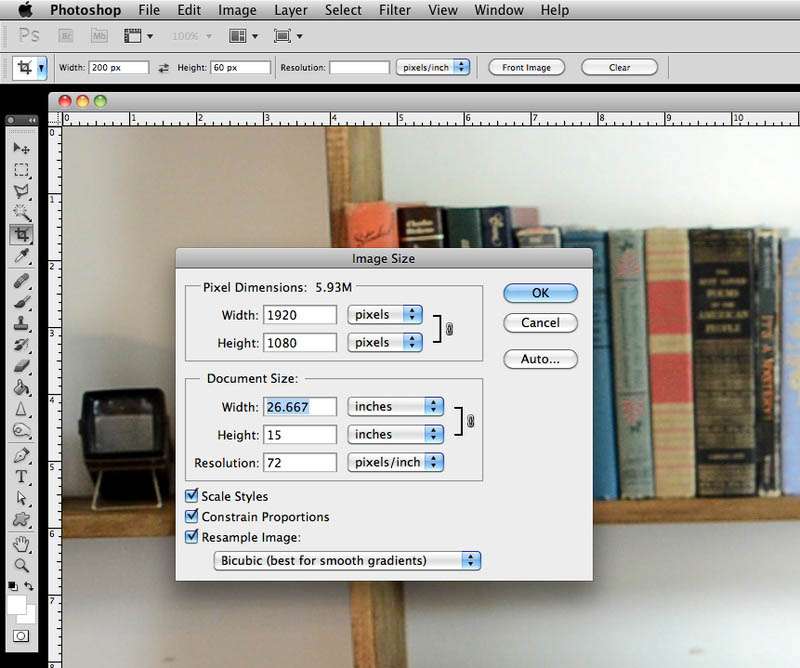
Step Four: I am going to reduce the image size. Doing this will keep your file size from being HUGE and it’s not necessary to have an enormous GIF (which is how we will save this file).
Make sure “constrain proportions” is selected. Then reduce to whatever you want. I think I changed my width to 8 inches.
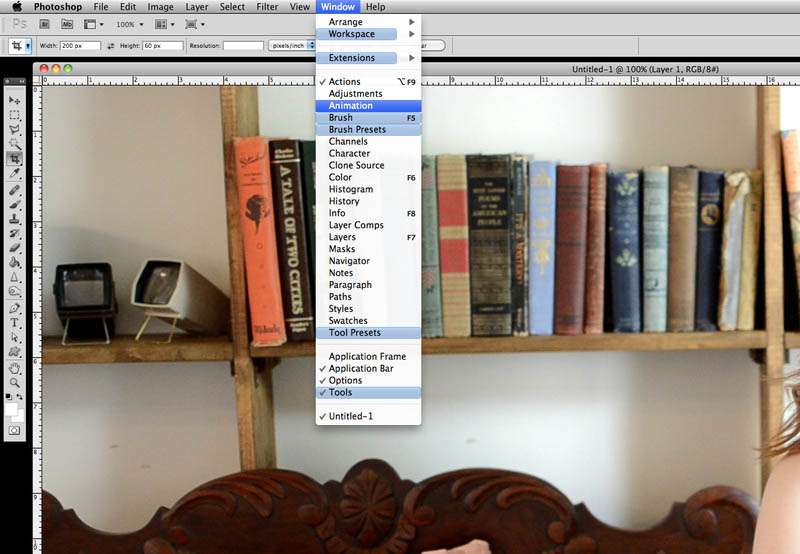
Step Five: Now, got to Window – Animation.
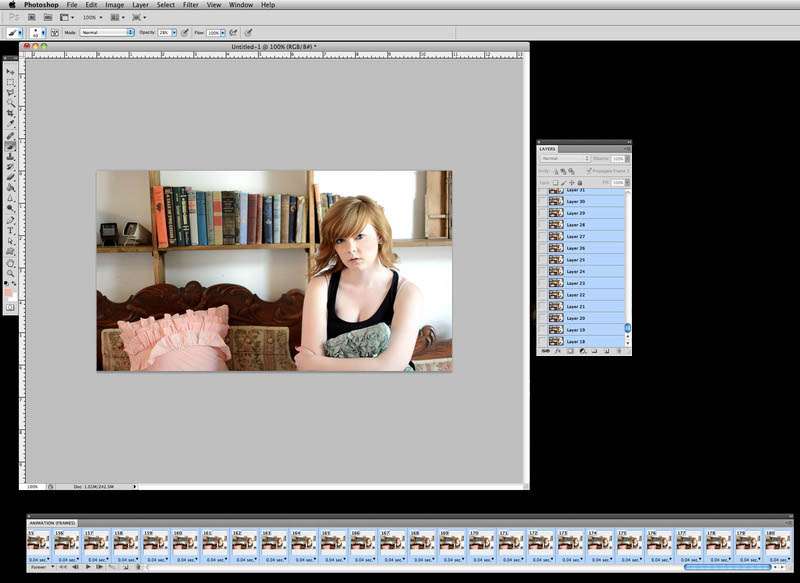
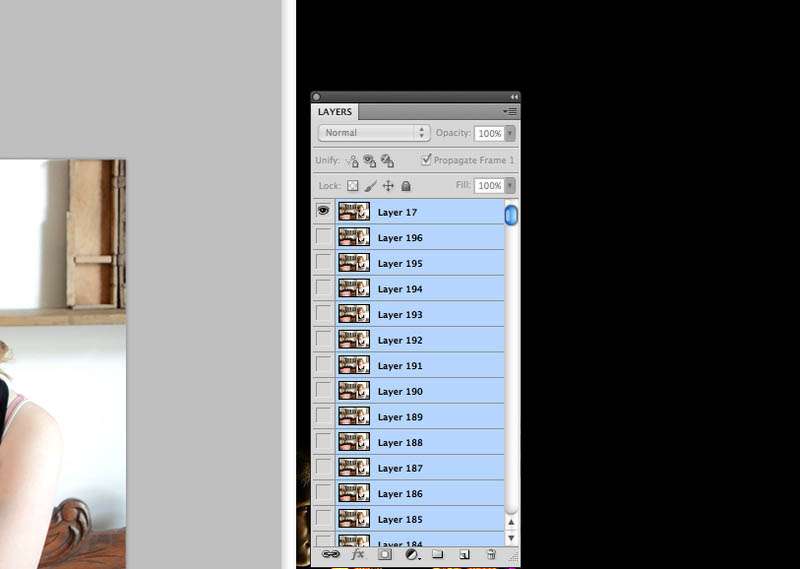
Step Six: Find your first image in both layers and animation. This will be your top image (so this image would be what would show my face, background and everything besides my hair which will be moving). Now click ‘shift’ and select all your animation frames and turn the eye on for that top layer. So now this first layer will be visible on top of every other frame currently. If you click ‘PLAY’ in the animation box, it will simply show this top picture. Nothing will move. If so, you have done it correctly. You want every frame to have 2 layers visible. The top first layer and one other layer that corresponds with your animation (please comment if you are having a hard time following this part!)
See the eye turned on for that top layer? That eye should be turned on for every animation frame you click on.
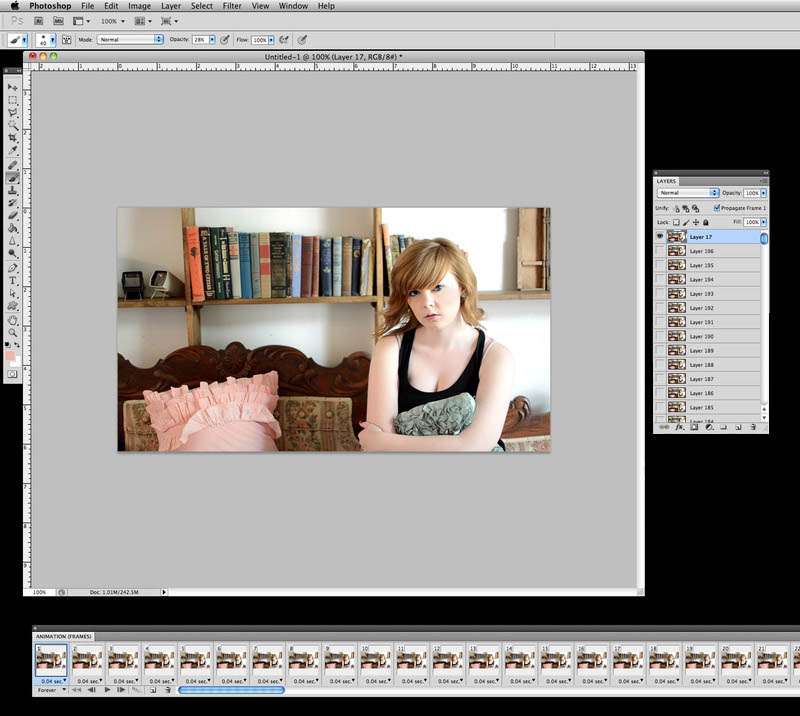
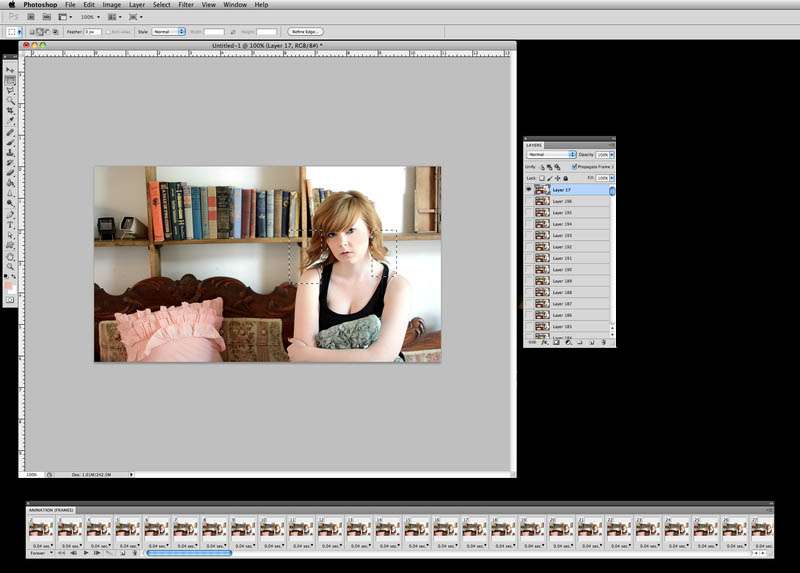
Step Seven: Now click on the first frame in your animation and the top layer. Use your selection tool to frame the areas you want to shine through and show off movement. Here, I have selected the edges of my hair. Now, press delete.
Go to your animation and press PLAY. You should see your top layer remaining completely still while the deleted area allows the movement from all the frames to shine through.
You’re done! Now got to File – Save for Web and save as a GIF. I additionally did color adjusting to my frames to give it a vintage feel.
Here’s my final result!

