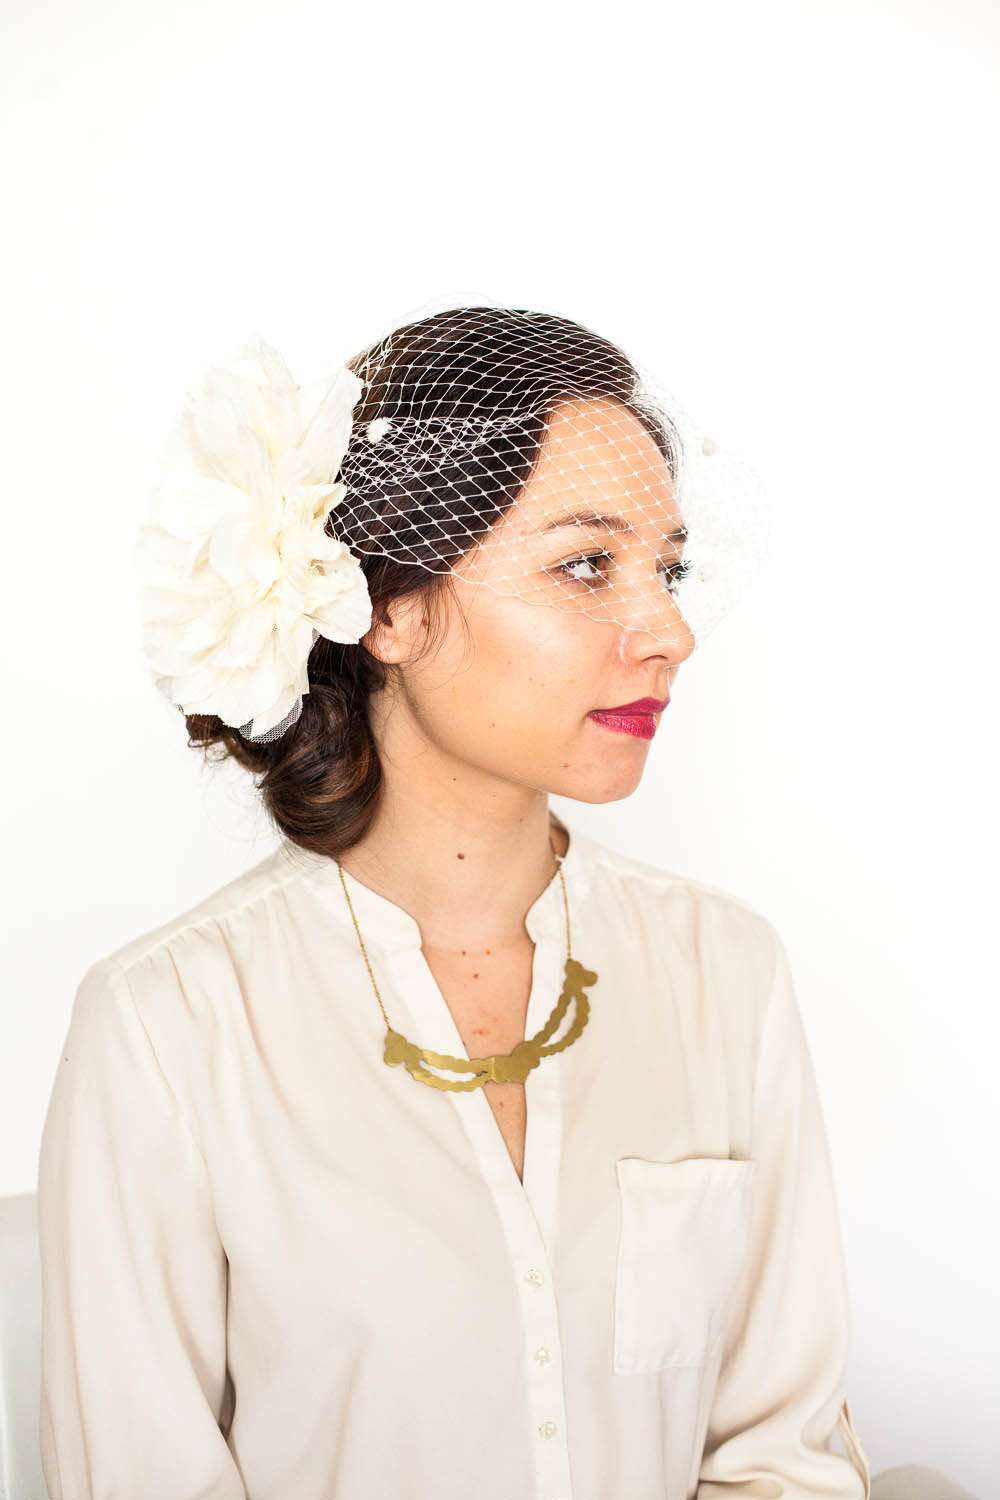
Today’s DIY hair tutorial is actually quite a classic bridal hairstyle. But funk it up with your most fabulous accessories and it can be anything but! This is the third tutorial from my collaboration with Your Cloud Parade and 10.11 Make Up (you can see last week’s hidden braid and the previous week’s faux hawk here!)
Supplies Needed
♥ Hairspray (we used Kenra Volume Spray)
♥ Bobby and hair pins
♥ Curling iron (we used Hot Tools – barrel size may vary based on length of hair, just for adding texture)
♥ Texture spray (we used Kevin Murphy Resort Spray) or spray wax (we love KMS Hair Play spray wax)
♥ Backcomber (we used Tool Structure Tortoise Backcomber)
Method
Step one: Add some texture to the hair by adding some curl. Spray with some texturizing spray or spray wax.

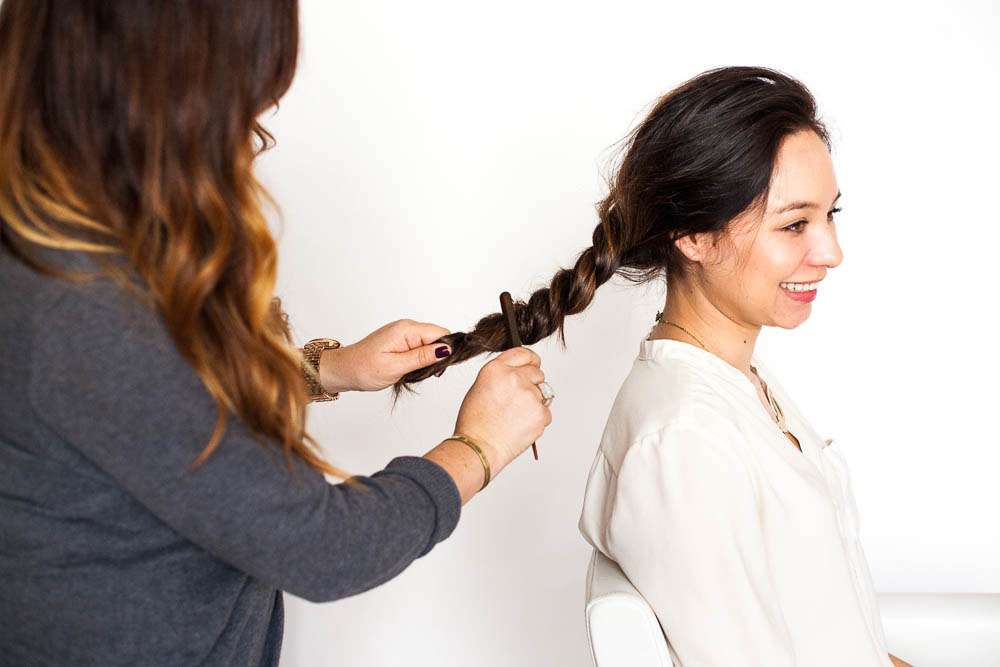
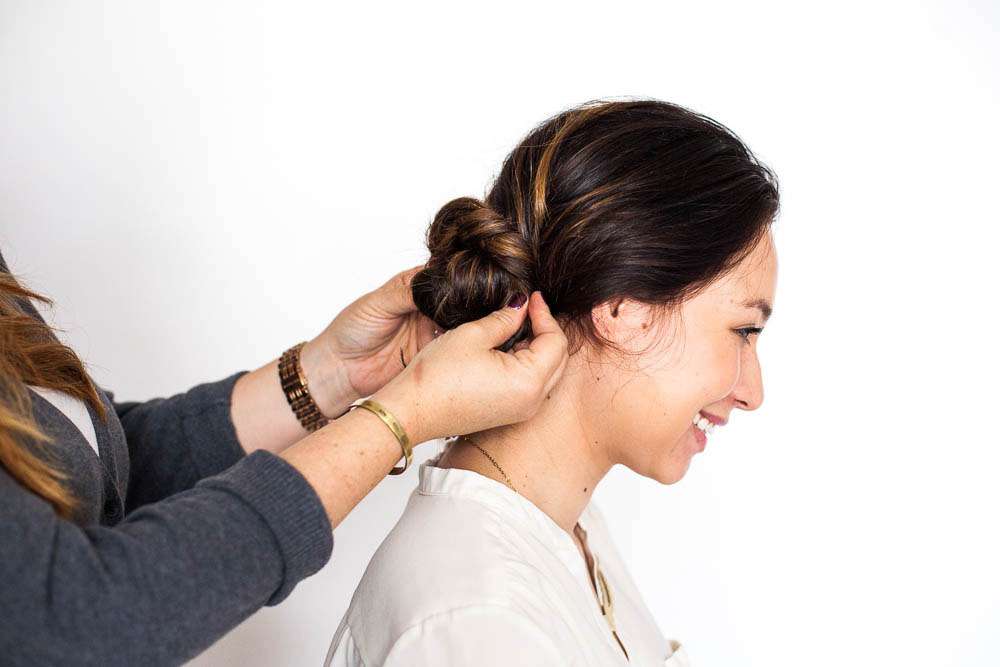
Step two: Section out the hair around the crown of your head, leaving out the front and sides- you will want enough hair on each side for braids, as well as any hair you want framing your face.
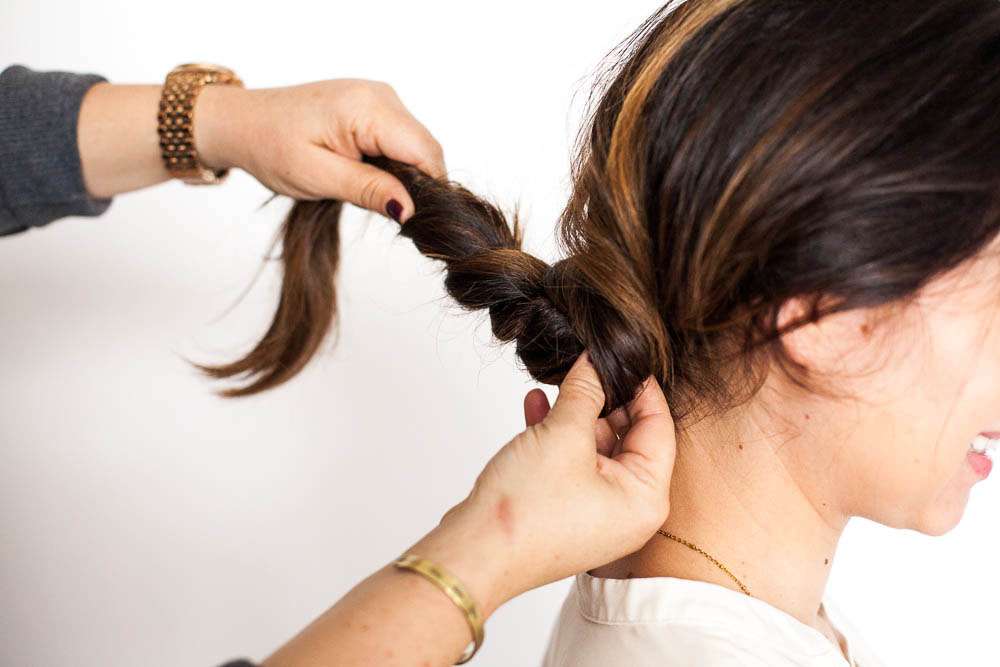
Backcomb/ tease the hair you have gathered at the back of the crown. Gather the hair around the crown and pin from each side creating an “x”. You can slightly push the hair up to create lift and volume prior to pinning.
Take one side of the hair you left down, leaving out any hair you want framing your face, and braid.
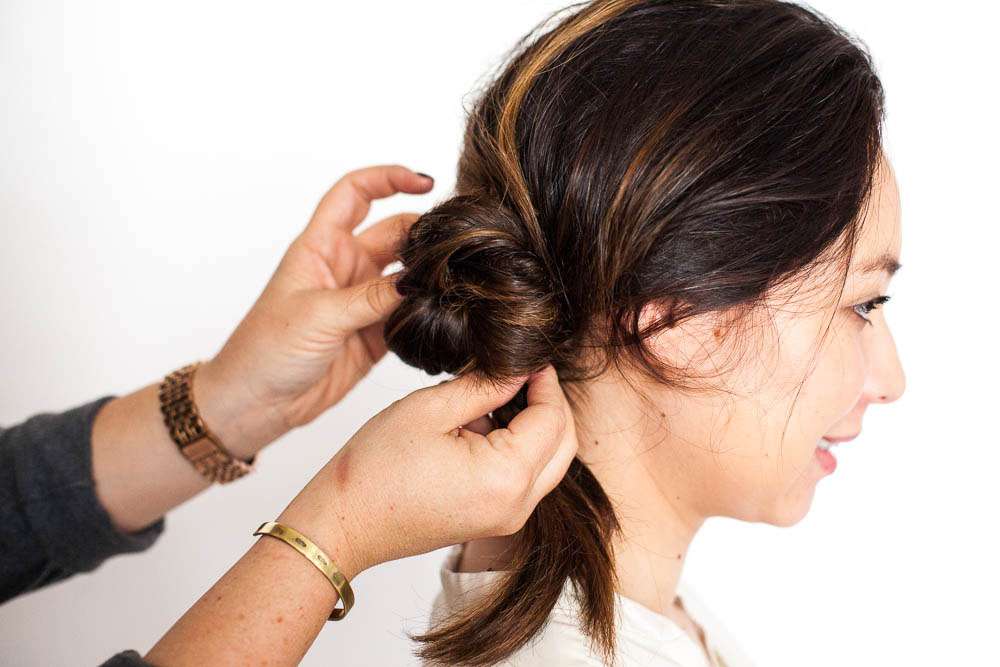
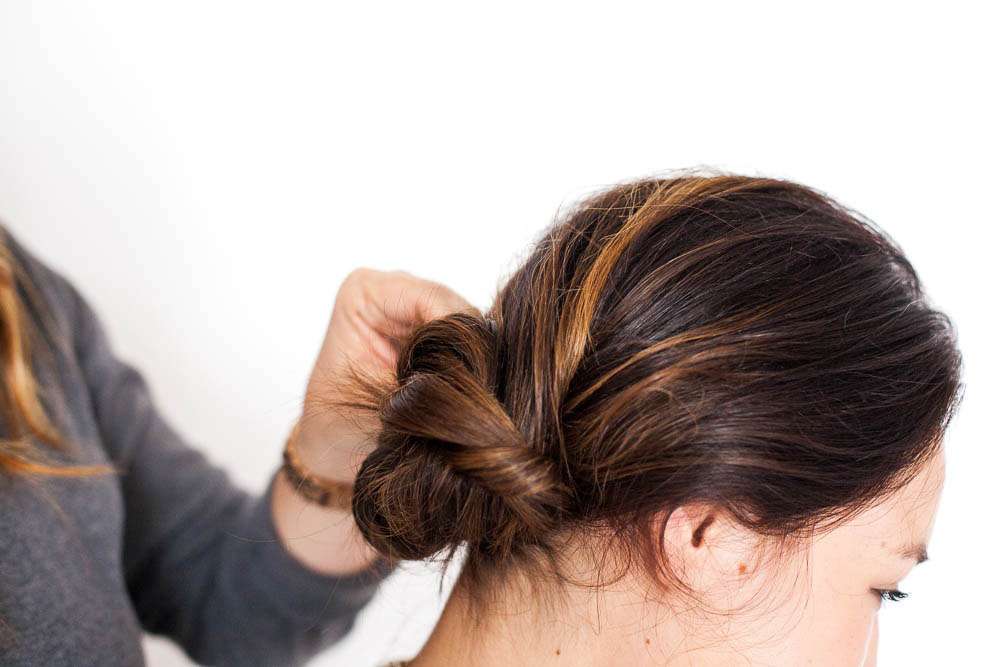
Step three: Use your backcomber to back comb the braid to add texture and fullness to it, or you can gently pull on the braid to loosen the hair making it fuller. Pull the braid across the back, covering the previously pinned hair, and pin the braid.
Repeat with the opposite side, covering the end of the braid you just secured, and bringing the hair across, tucking the ends under the other braid, and pinning.
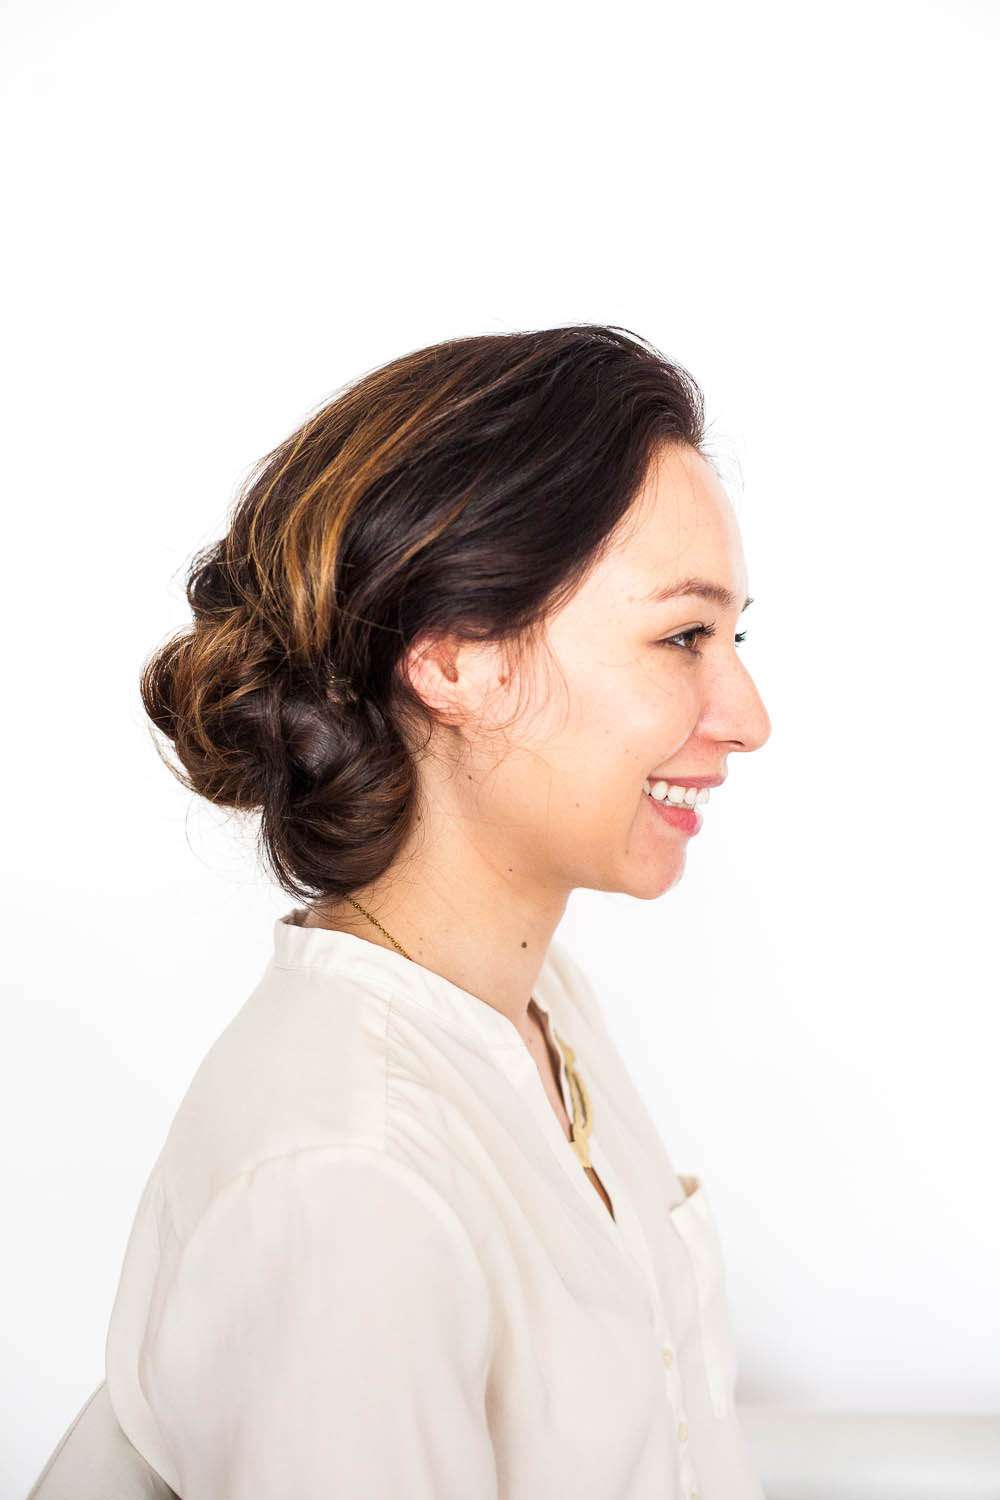
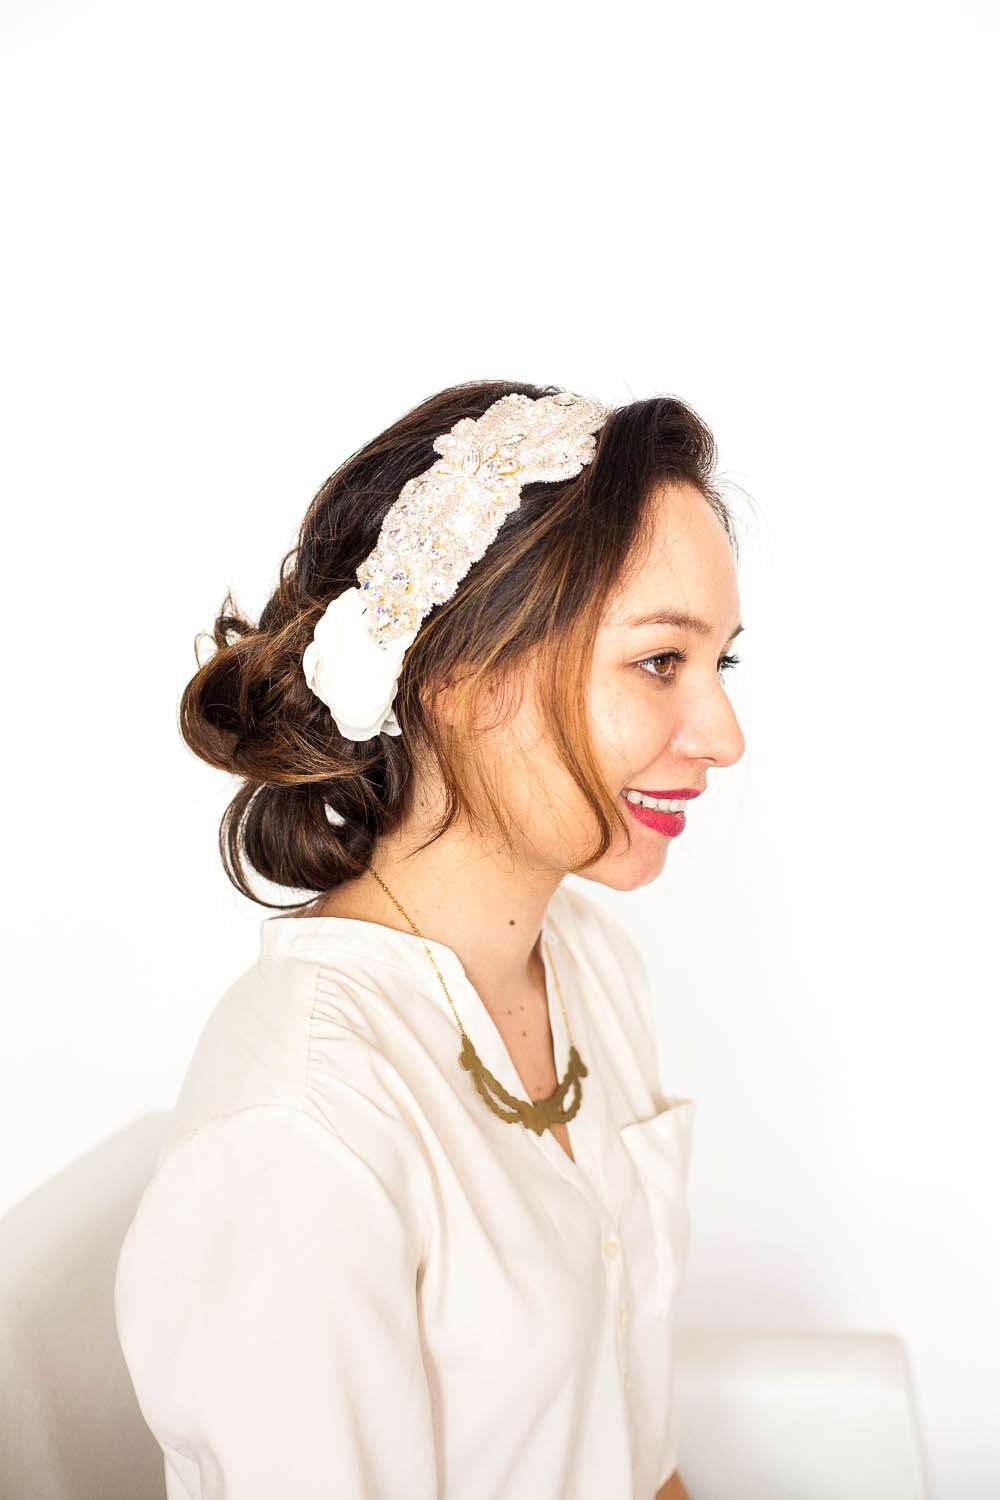
Step four: That’s it! Add your hair accessory and you’re all ready to go.
Suppliers
- Photography #1: Mark Brooke Photography
- Photography #2: Mathieu Photo
- Concept & Accessories: Your Cloud Parade
- Hair Stylist: 10.11 Hair & Makeup
- Necklace: Jazzmine Jones
- Hair Accessories: Olivia Nelson