Renovation pro tip: If you want to get your significant other to step up their DIY game then plan a photo shoot in your building site of a home as a matter of urgency!
A few months ago I booked a collaboration with a super cool wedding brand (more on this soon!) and had the idea to shoot some of their products in our house. At the time I figured that surely by November the rooms we wanted to shoot in would almost be finished… or could at least be passable for the purposes of some staged shots.
WELL my friends, any of you that have embarked on your own renovation project will know that this was potentially one of the most stupid and stress-inducing ideas I’ve ever had. A week before the shoot and we still had the old curtains (that came with the house and looked like they hadn’t been updated since 1987) up, no skirting boards, power sockets hanging off the walls and a whole heap of junk in the corner. Brilliant.
Luckily I am married to a man who works best under a very specific set of criteria – the foremost of these being A DEADLINE. I’m the kind of nerd who did her homework at least a week before it was due, Gareth’s the kind of infuriating bastard that would do his on the bus on the way to school and still get straight As. Give Gareth a hard and fast deadline and he shines…. Be it all at the last possible second.
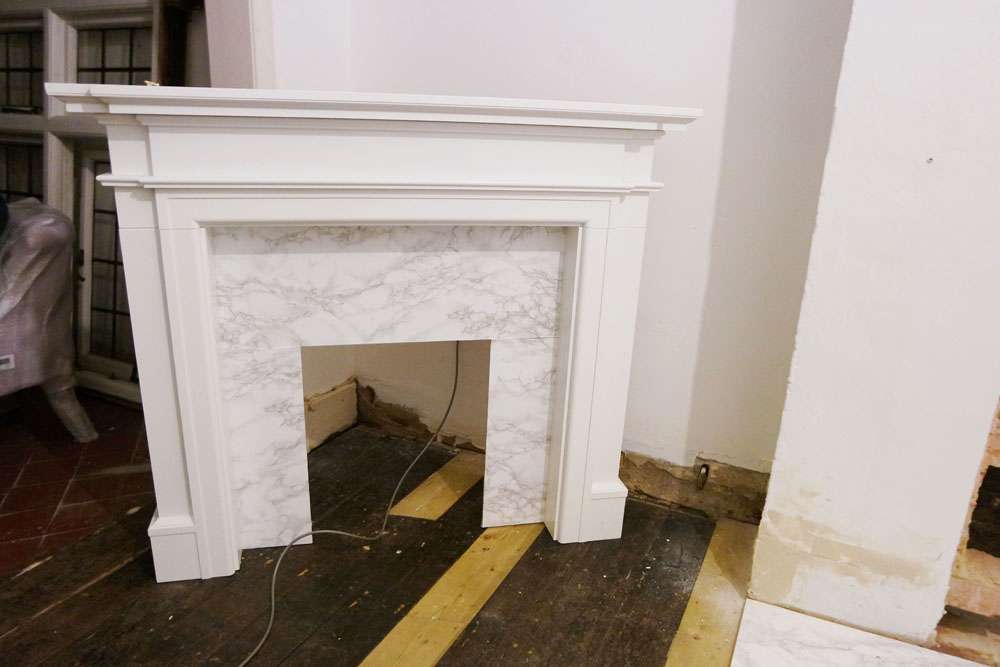
So three days before the shoot, Gareth comes to me and says “Hey, wouldn’t the shoot look better if we had a fireplace in the room?“ “Er yes, yes it would”, I replied, not thinking he’d actually tackle such a massive task with just 72 hours to spare. But deadline-loving Gareth not only got on with it, he got the project done in record time… even if he was still painting the walls 30 minutes before the photo shoot crew were due to arrive.

You might, as I did, think that knocking through a fireplace would be an almighty and difficult task, and while it’s definitely not something I’d ever tackle on my own, if you or your lover is more confident on the DIY renovations front, then there’s absolutely no reason why you can’t do it too.
So I spoke to Gareth and these are his tips if you want to do the same.
First things first, this isn’t a functional fireplace and moreover it isn’t even a finished decorative opening. But it took a few days of my free time and cost less than £20 in materials.
If you’re doing the job properly you really need to strip the plaster right back to expose the original brickwork of the chimney breast. This will probably mean exposing the whole width of the chimney to a height of 1m – 1.5m. It will then be nice and obvious where the original fireplace opening was, and where any supporting lintels or arches are. In an older property like ours the original opening might be quite large and have been reduced in height when a more modern fireplace was installed before eventually being sealed up completely. Where the original fireplace opening has been filled in will usually be quite evident in the brickwork since a different size and type of brick will have been used. However in our case, I didn’t need the added pressure of re-plastering the wall so I started slowly from the middle and worked my way out removing only the minimum brick and plaster necessary to create the opening.
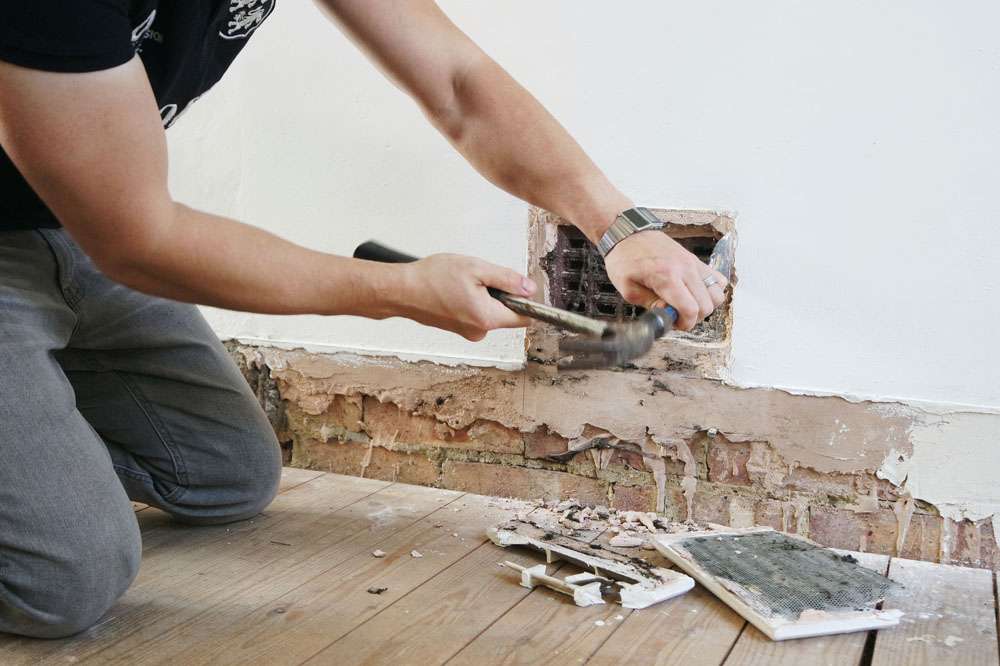
As chimney tops are open to the elements they can catch moisture so you will often have vents installed where the old fireplace opening was. This lets the inside of the chimney dry out after rainfall, etc. This is your starting point. In our case we had a clay air brick behind a horrid white plastic vent. I used an SDS drill and made a series of holes all the way through the mortar surrounding the air brick (an ordinary hammer drill would work but would take a lot more effort and wear out your drill bits if the mortar is anything like as hard as ours was). Once I’d gone around the whole brick I just went at it with a hammer and bolster chisel to remove the remaining mortar and free the brick. This was a lot louder, harder and slower than I expected so prepare to get a bit of a sweat on. Eventually the brick can be maneuvered out, and oh God, there’s no going back now!
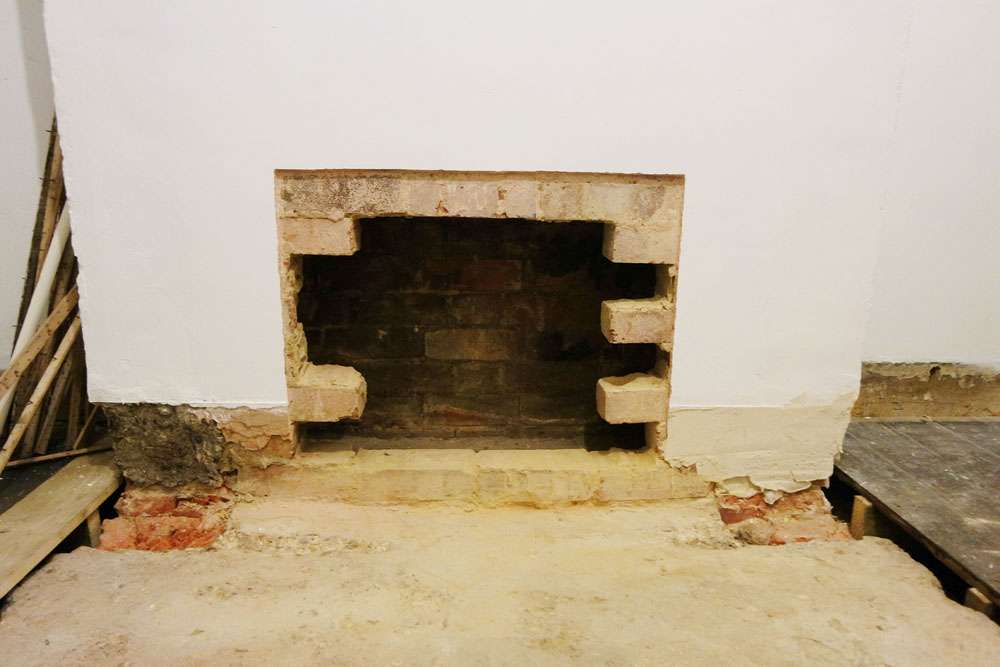
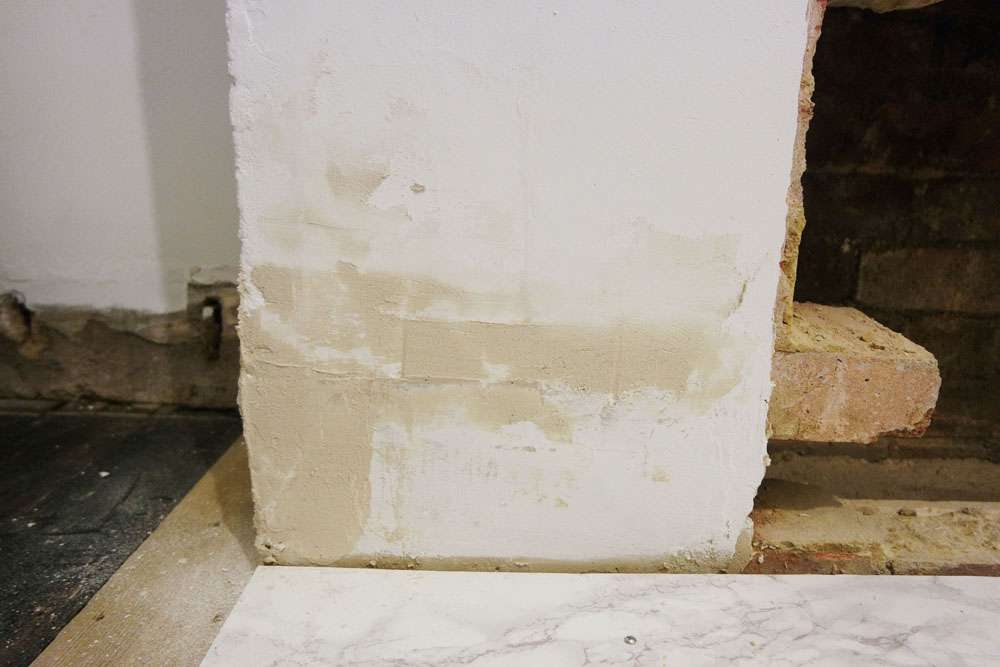
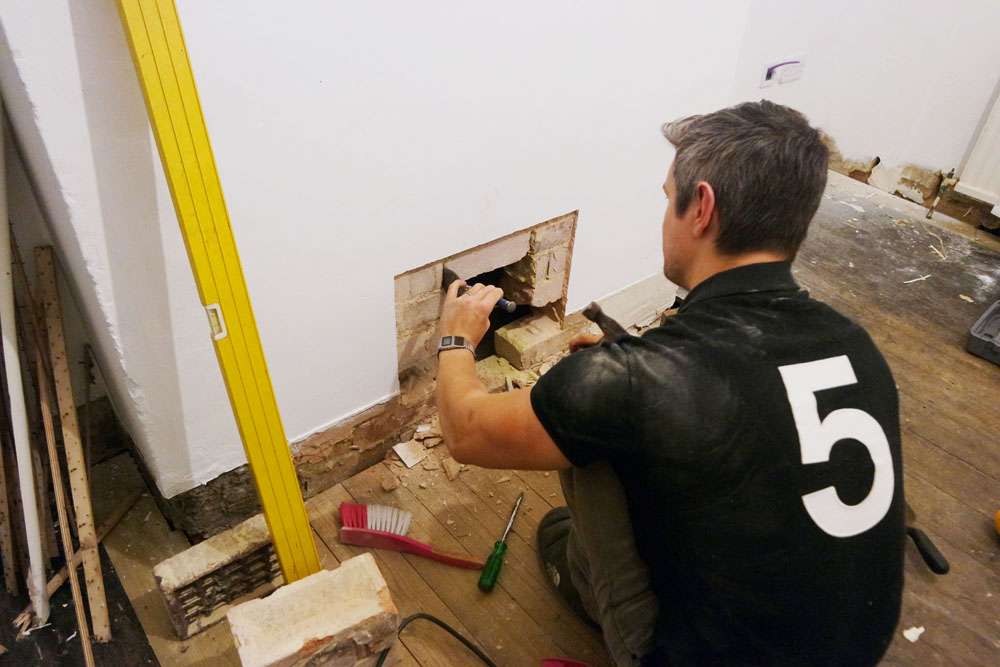
Once the air brick was out I could see that in our case the brick above was no longer resting on anything (held in only by mortar to the bricks above and to the side) and so was safe to remove too. At this stage I was able to get a glimpse inside the chimney, armed with a small torch, I squeezed my head into the tiny opening and looked around. First impressions were that it was full of debris – ash, brick, spiders – but was generally in good condition. I was expecting it to smell damp and maybe have a dead pidgy or two but nope, all clear. I removed what rubbish I could, as well as the spiders from my eyes, and felt around behind the opening. The mission at this stage is to inspect the construction – confirm there is a lintel or brick arch supporting the brickwork above the original opening and how wide it spans. I was able to see that the small opening I wanted to create would be no problem here and felt confident enough to continue work. So drill, chisel, sweat, repeat. One of the slightly more cowboy ways I cheated some time back was to not bother squaring up the staggered sides of the opening created by the brickwork, I should have filled the rows with half-width brick but I knew that the faux-marble fire back would hide all this during the shoot anyway so didn’t worry about it for now.
The faux-marble back and hearth is just OSB sheet (cut to size for me in about 20 seconds by the chap at B&Q) and sticky-back plastic. When working with sticky-back plastic make sure your surface (the OSB in this case) is clean and dust-free and lay the plastic down. Slowly smoothing it down from the centre out to work out any air bubbles, you should get a very satisfactory finish quite easily – you can carefully lift from the nearest corner or side if a crease forms to help it out. I found a bare Stanley blade was great for trimming to the edges but if your edges are exposed you will get a great finish by carefully folding the plastic around and underneath the material. Once it’s all down and looking OK, grab a hairdryer on a high heat and at a distance of around six inches heat the plastic. It will initially expand and start to wrinkle and you’ll panic wondering why you didn’t leave it alone – it looked fine as it was and now it’s ruined… but just then it gets hot enough that it shrinks, like your partner’s Christmas jumper which you ‘accidentally’ put in the tumble drier. Do this to the whole thing and you’ll have a flawless finish! I mean, maybe test on a small piece first in case you have a different brand of plastic and it doesn’t react quite the same way?
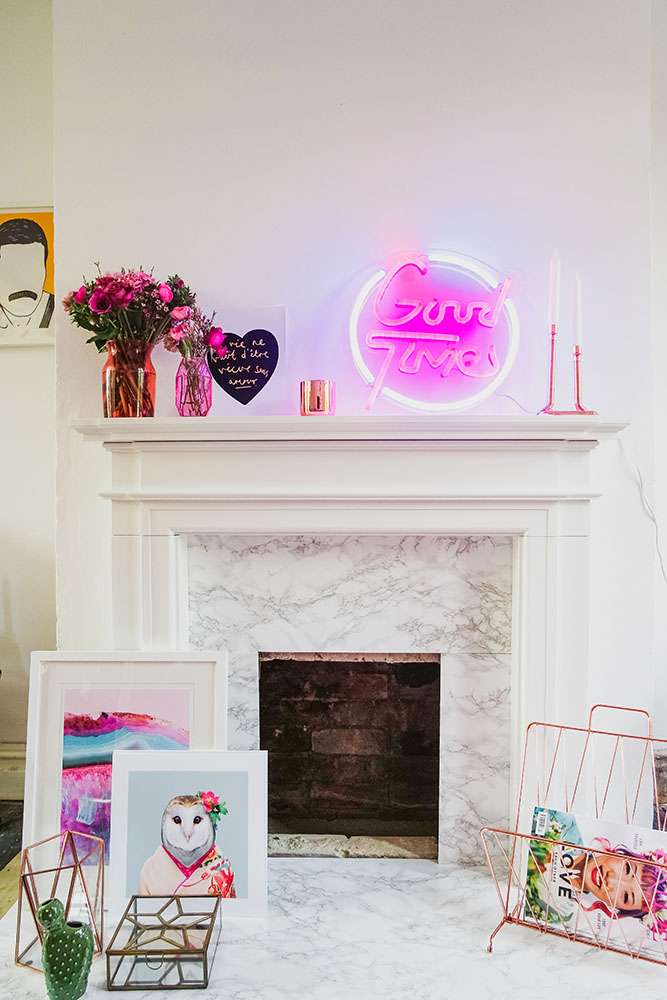
Now I don’t know about you, but I think the fireplace turned out SO WELL. We were kindly gifted the surround by Focal Point Fires (available in B&Q and this model, the Montana, is actually on sale right now) so in total this project cost us the grand total of £19. Yes, £19!!

As Gareth said above, this is really just a cosmetic, temporary makeover. It isn’t fireproof and we can’t actually use it as a functional fireplace until we get something much less flammable in place. But for the purposes of a photo shoot and, you know, just having something pretty to look at, I think it’s the perfect solution. Plus, when I posted a photo of it on my Instagram you guys had so many questions about how we did it so I hope this article answers some of those!
So there we have it, a fireplace put in in just a couple of days! We could not be more thrilled with it, it’s actually totally made the room, so much so that we’ve now moved all the furniture over from the snug so we can use this as our primary reception room. Our/ his next big job is replacing all the joists in the snug, which he’s already done in this room so it shouldn’t be TOO stressful. I was also promised a new kitchen by Christmas, but I’m not so confident that’s actually going to happen now. Is it really mid-November already?
Oh I know, all I need to do is plan a kitchen photo shoot next month to expedite the process!