Your wedding bouquet doesn’t need to die a slow, soggy death in a vase after your wedding. If you’ve put time, money, and meaning into your flowers, why not actually do something with them? Pressing your bouquet is an easy, hands-on way to make something that will last forever.
Artist and founder of Domain of the Flowering, Tricia Paoluccio, breaks it down into something anyone can do, no experience required. This is your no-fluff, no-fuss guide to turning wedding flowers into something worth keeping.
STEP ONE: Save what you can, soon
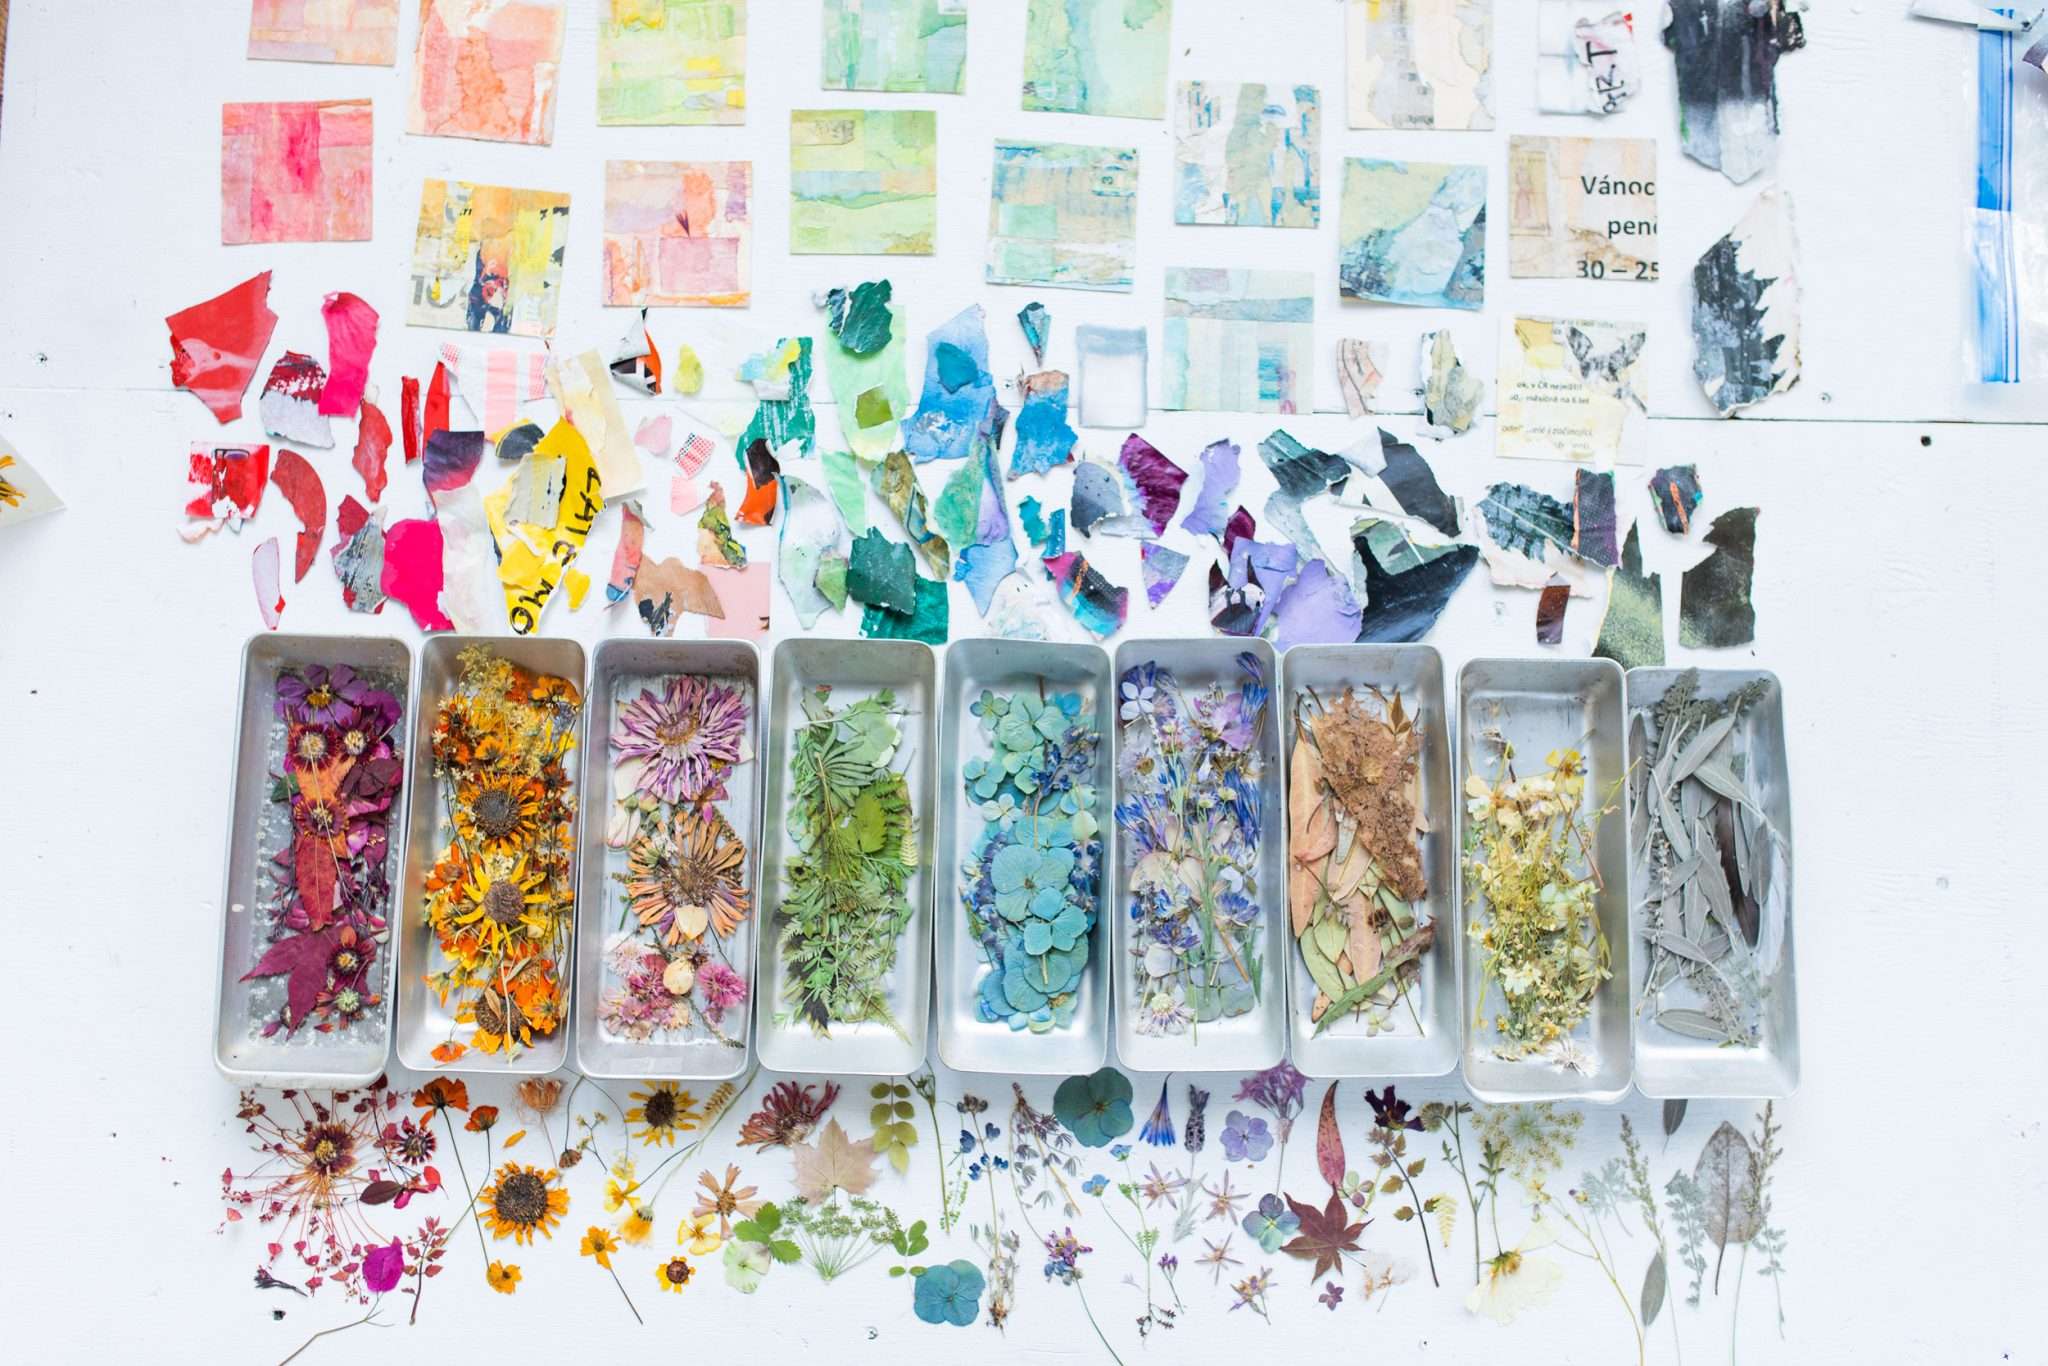
Remove the blooms you want to preserve within a day or two of the wedding. Any longer and they may wilt too much. Choose a mix of sentimental favourites and flowers in all stages: bud, bloom, and fully open. Don’t overlook the supporting cast – leaves, tendrils, pods, even weeds. Often, the tiniest elements add the most texture to the final piece.
STEP TWO: Let them breathe, literally
Flowers that are waterlogged, misted, or fresh from a bouquet need time to air dry before pressing. This is letting the bouquet exhale.
Gently separate the blooms from the tight bouquet and let them rest in a vase with fresh water for a few hours or even a few days in a warm room. This helps them perk up. Then, take the thickest flowers out of the water and lay them flat on a table to begin “wilting.” This step helps dense, petal-heavy blooms like roses or dahlias lose excess moisture before pressing. If any part of a flower is wet when it enters the press, it’s likely to turn brown. These steps are essential and are part of my “wilting method.”

STEP THREE: Build the press like a layered cake
Fancy tools aren’t required, just thoughtful layers and care. That said, a proper flower press is recommended. If you don’t have one, you can just place something heavy on top of the below, like stacks of books. Each flower type should go on its own layer. Here’s the preferred stacking method:
💐 Cardboard (corrugated, for airflow)
💐 Chipboard (like a cereal box, smooths out pressure)
💐 Printer paper (about 10 sheets)
💐 Flowers (same type per layer, don’t overcrowd)
💐 More printer paper (10 sheets)
💐 Another piece of chipboard
💐 Then cardboard again
Repeat for each set of flowers. The goal is even pressure and a dry, absorbent environment.

STEP FOUR: Wait. And change. And wait again.
This part requires patience. Most flowers take 7 to 14 days to fully dry and press, depending on the flower type and your climate. Take care when opening and closing your press/ removing your books. If the blooms aren’t properly aired beforehand, petals can stick to the paper and tear. Expect a few flops. Discard anything that’s turned brown, and save space for blooms that are drying well.
STEP FIVE: Practice (but not yet with the wedding ones)
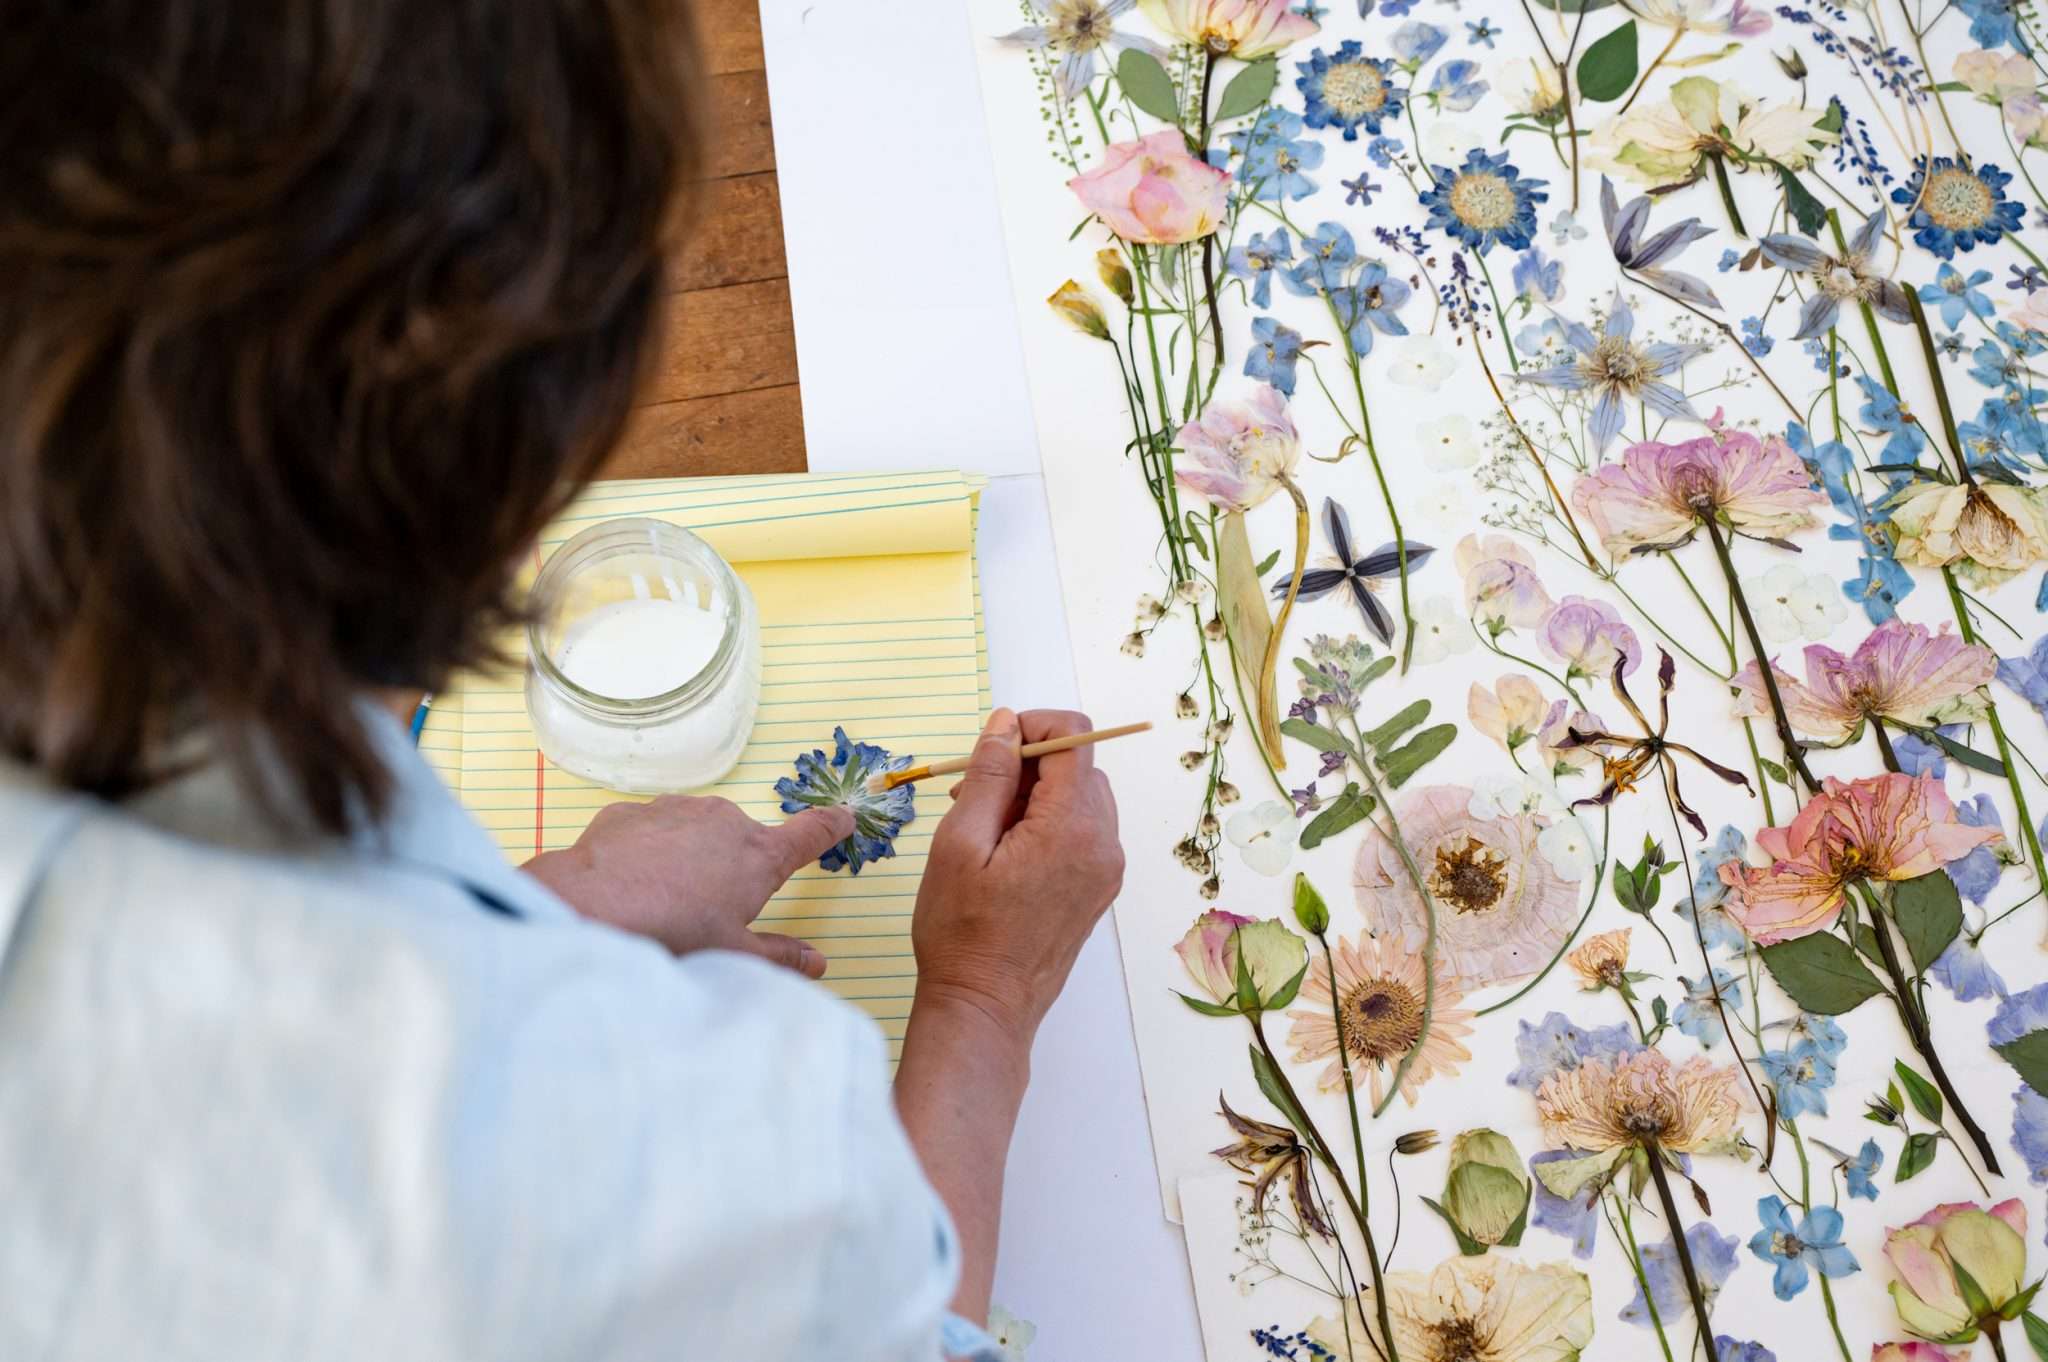
Once you have your collection of pressed flowers ready for art, now is the time to practice gluing. Gluing is its own craft, delicate and final. Use imperfect blooms, grab some paper, and give yourself the freedom of low-stakes practice.
Set a timer for 20 minutes a day. Don’t aim for a masterpiece, just glue. Use one nice, thin layer of glue (preferably neutral pH, such as PVA). Practice, practice, practice. Over time, your hands will steady, your brushstrokes will become confident, and the glue will disappear. When it’s finally time to work with the wedding bouquet, you’ll be ready.
About the Author
Want to go deeper? This guide is just the beginning. For more in-depth tips, Tricia’s recorded two-hour classes at modernpressedflower.com help anyone get started.
For those craving more guidance, confidence, and in-depth training, her mentorship program BLOOM may be the next step. It explores advanced preservation techniques, gluing, layout, and composition with personal feedback, live support, and a community of fellow creatives. It’s a space to transform pressed flowers into meaningful art, heirlooms, or even a creative practice that becomes a lifelong return point.